

Purchasing a microscope can be the most exciting thing when you build your classroom or home laboratory. However, it could also be a confusing process for beginners. This article aims to provide you the necessary knowledge and to guide you through the decision process. Let’s start hunting for the “Right” microscope for you!
This article covers
We are talking about the “Light Microscope”
Before we start, I want to remind you that everything in this article refers to light microscopes (or optical microscopes), which is a microscope that includes a built-in light source. There are other types of microscopes, such as fluorescence or electron microscope, but they are extremely expensive and typically used in scientific research institutions. If you are interested in these advanced microscopes, check out the universities near you for their open-house or public science day.
By the way, a new product called a digital USB microscope is becoming more and more popular now. It is a completely different territory. We will cover it later.
Compound Microscope vs. Stereo Microscope
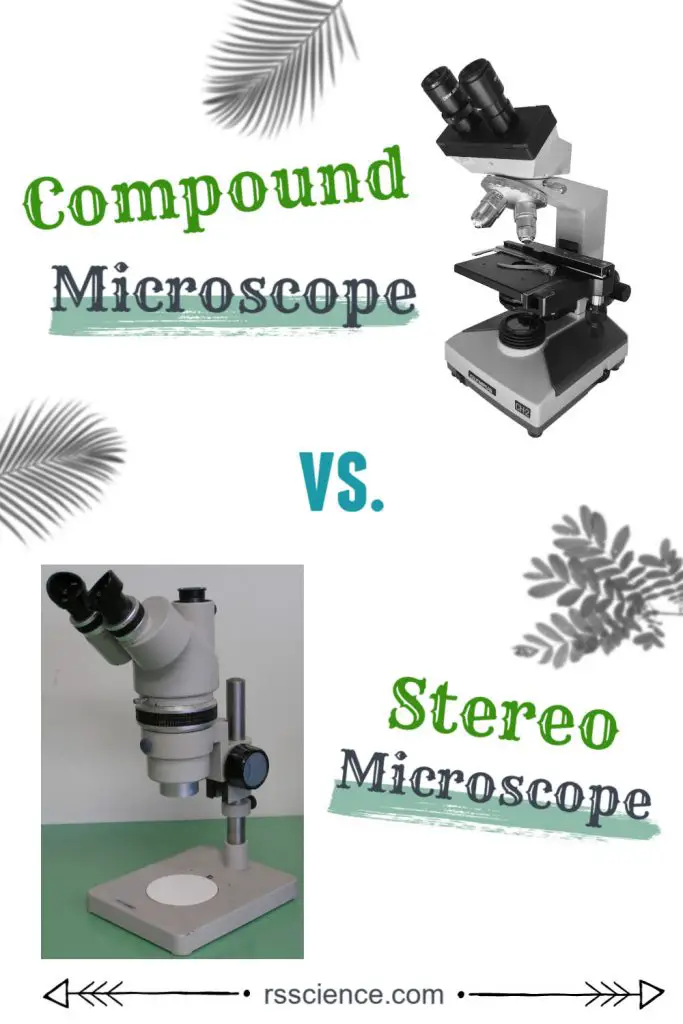
Basically, light microscopes use visible light to illuminate the specimen and to form the images. Based on the applications, light microscopes fall into two main categories: the compound microscope and the stereo microscope. Therefore, the first step of buying decision is to determine which types you need. Below is a picture of the compound and stereo microscope.

[In this figure] The compound microscope vs. stereo microscope.
What can we see under a “Compound” microscope?
Compound microscopes (also referred to as an upright light microscope) are probably the most common microscopes you can find. Because the light has to pass through the specimen, the ideal specimens for compound microscopes are small and thin stuff.
Good examples are protozoa in the pond water, blood smear (blood cells), mouth swab (cheek cells), thin plant and tissue sections, pollens, cells, bacteria, semi-transparent water organisms (like water bear or algae), and premade slide sets. Images below are examples using a compound microscope.

[ In this figure] Images using a compound microscope.
A. Rotifer (bright field); B. Helianthus stem (thin stained section – bright field); C. Fish red blood cells (Stained – bright field); D. Bacteria (Gram’s Iodine stained – bright field); E. Loosen stem (thin stained section – bright field + image stitching); F. Rhoeo Discolor leaf (bright field + blue filter); G. Human cells cultivated in Petri dish (phase contrast); H. Citric acid micro-crystal (polarized light).
In contrast to the stereo microscopes, compound microscopes have a much higher power of magnification to see the details of a subject. Therefore, compound microscopes are also known as high power microscopes.
Typically, a compound microscope is supplied with 3-5 objective lenses that range from 4x to 100x (4x/10x/40x/63x/100x). Assuming you have 10x eyepieces and 100x objective, the total magnification of this combination is 1,000x (10×100 = 1000). By using special condensers, compound microscopes can also achieve darkfield, phase contrast, polarized light, or differential interference contrast (DIC) images for particular applications.
Things to consider when choosing a Compound microscope
1. Price
The microscope is a pretty mature market which means “you paid for what you get”. It is fair to say that the microscopes made of plastics (below $30-40) are toys for children to have a sense of what science is.
For a beginner, a microscope with a metal arm and 3 objective lenses (around $100) could be a good start. However, some microscopes in this range claim that they have 100x objective lenses and can be used to see tiny organisms such as bacteria. In fact, you may end up with disappointing burr images due to the low resolution. (Hint: oil lens to solve resolution).
If you take microscopy as a passionate hobby (and maybe you want to post some amazing pictures on your Facebook or Instagram), a solid compound microscope with a full metal body, a decent collection of objective lenses, a trinocular port for the camera, a mechanical stage for moving specimens, and an exchangeable condenser module could cost you more than $300-1000.
Considering these high-end microscopes, I will pay extra attention to the extensibility (the capability to upgrade according to the potential future use) and after-sale service. For microscopes used for a classroom, I will also consider the ease of maintenance and repairs.
2. Magnification
The quality of objective lenses determines the quality and price of a compound microscope. Thinking of what kind of specimen you will study the most and then choose the suitable lens set. Typically, a descent compound microscope (around $150-300) comes with at least 4 objective lenses (4x, 10x, 40x, 100x; usually a 100x lens is for oil immersion).
I will suggest purchasing a microscope that is compatible with standard objectives and oculars, in case you want to upgrade your lenses in the future. There are more technical considerations of objective lenses such as resolution and working distance, which I will write a more detailed article in the future.

[In this figure] Looking at the same specimen from low to high magnifications.
The top raw is a series of images of Vicia (pea family) root tip. At low magnifications (5x and 10x), you can have the overall view of the entire specimen. By getting closer (with higher magnification), you will start to notice the cells and their nuclei (blue dots). At high magnifications (63x and 100x with lens immersion oil), you can see some nuclei looked different from others. These spindle-shaped nuclei are dividing (or under mitosis) and their chromosomes (bundles of DNA) are moving apart.
The bottom raw are images of human blood smear. At low magnification, you may only be able to see many red particles (they are red blood cells and they don’t have nuclei) everywhere. Only while rotating the objective lens to at least higher than 40x, you can notice some cells are bigger and with nuclei (dark blue). Those are white blood cells. At 100x, you can see very clearly the unique multi-segmented nuclei (dark blue) and pink granules. Based on these features, we can conclude they are neutrophils, which protect our body by engulfing bacteria.

[In this figure] Spindle-shaped nuclei are diving (cell division).

[In this figure] Immersion oil increases the clarity of the image.
It is particularly useful when you use a higher magnification objective. For more detail, please click here.
3. Monocular, Binocular or Trinocular
The Monocular microscope has only one eyepiece and is usually found on the low-priced items. The Binocular microscope that allows you to see with both your eyes is the most popular and easy-to-use choice. Make sure to choose the one with adjustable eyepieces because the distance between the two eyes is different for everyone. A Trinocular microscope has two eyepieces like a Binocular microscope and an additional third eyetube for connecting a microscope camera. Usually, the Trinocular part is exclusive for a high-end product. By using an adaptor or a camera/phone holder, you may also take pictures on a Binocular microscope.
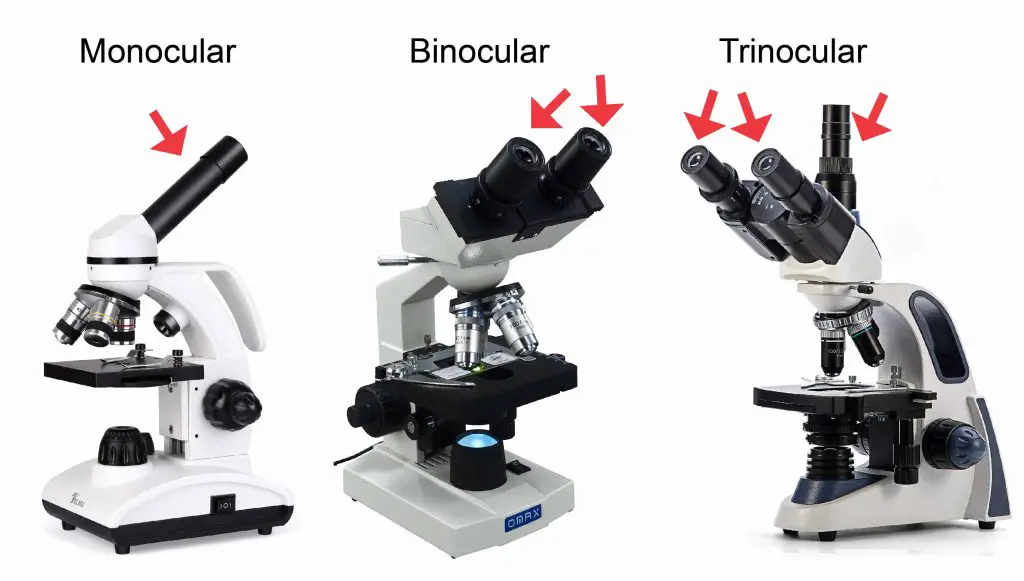
[In this figure] Examples of Monocular, Binocular or Trinocular microscopes
4. Iris Diaphragm & Abbe Condenser
A descent compound microscope (higher than $200) should equip with an iris diaphragm and a good quality condenser – ideally, an Abbe condenser which allows for greater adjustments. Both items are found in the sub-stage of the microscope and are used in adjusting the base illumination to ensure a uniform lightness of your microscopic images.
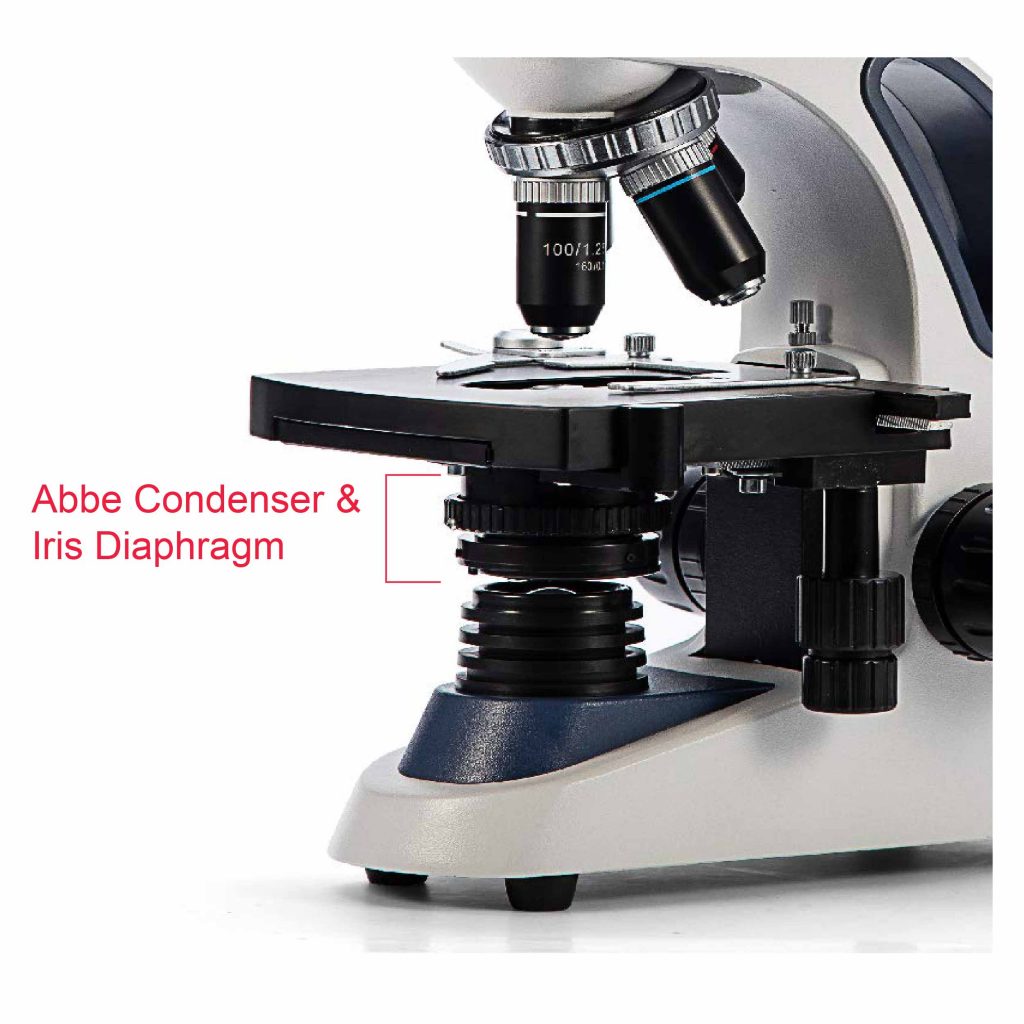
[In this figure] Both Iris Diaphragm & Abbe Condenser are equipped under the specimen stage
5. Accessory
Some microscope comes with a microscopic slide preparation kit that may include many accessories like slides, coverslips, test tubes, tweezer, etc. It may catch your eyes because you may eventually need most of this stuff. However, based on my personal experience, these accessories are not the best quality. I would rather purchase them according to my needs or buy a high-quality microscope accessory set.
On the other hand, some accessories (like dust cover, maintaining tools, power cord, and user manual) must come with the microscope. If you can’t find them, contact the seller immediately! If you look for a high-priced item, it is worthwhile to ask the sellers to include some accessories as gifts. For example, I will ask for immersion oil (if your microscope is equipped with oil lens), lens cleaning paper and solution, additional lamp/LED, and extended warranty or annual maintenance service.
6. Repair, Replacement, and Customer service
There are more details about choosing a microscope, but I don’t want you to worry too much right now. We will post our product reviews consistently on our website if you want to dig more. However, a couple of common principles are worth mentioning here.
Make sure you ask the seller about the policy and the process of repairing and maintenance.
Do they have a technical center near you, or you have to ship your microscope for service?
Do they provide warranty or annual maintenance?
You may want to read the reviews about the seller’s customer service. For a high-priced item, choosing a well-established brand can guarantee that you can find a professional technician to fix and extend the lifespan of your valuable microscope many years after the purchase.
7. Which Brands? Second-hand?
The compound microscopes are pretty mature products. For beginners, you may not need to purchase expensive microscopes from the top brands, like Zeiss, Olympus, and Nikon. Many companies (may not be as famous as the top names) also provide high-quality microscopes at a much affordable price.
For example, AmScope, Swift or OMAX all have decent selections from beginners to professionals. On the other hand, companies that are too new or too small make me worried about customer service, repairs, and maintenance.
For the same reason, I won’t recommend secondhand microscopes (you can find many on eBay) to first time buyers unless someone you trust is experienced and can help you with an unexpected problem.
What can we see under a “Stereo” microscope?
When you will need a stereo microscope?
You will need a stereo microscope to view more substantial specimens such as insects, feathers, leaves, rocks, gems, coins, stamps, etc. Functionally, a stereo microscope is like a much powerful magnifying glass. Unlike a compound microscope that offers a flat image, stereo microscopes give the viewer a 3-dimensional image that you can see the texture of the specimen. In addition, you don’t have to make a microscope slide for the stereo microscopes.
The name “stereo” comes from the term “stereoscopic,” meaning, using two different angles of viewing to create an impression of depth and solidity. Because of this, true stereo microscopes only come in Binocular and Trinocular styles. Also, unlike a compound microscope that can only see a very thin specimen, stereo microscopes can be used for viewing almost anything you can fit under them. However, stereo microscopes offer lower magnification, typically 6.5x-45x, comparing to compound microscopes. Below is an example showing the difference viewing by compound vs stereo microscope.

[In this figure] Looking mosquito head under compound and stereo microscopes.
A stereo microscope allows you to see the surface of specimens with a 3-dimensional view. Under a stereo microscope, you can see the metallic texture and colors of the mosquito’s compound eyes. In contrast, the light has to pass through the specimen to form the image under a compound microscope. In this case, the region of compound eyes is too thick to form a clear image. Right Image credit: Dr. Gareth Paul Jones, 2013 Photomicrography Competition, Technique: Stereomicroscopy, Fiber Optic Illumination. Magnification: 70x.
Things to consider when choosing a Stereo microscope
1. Applications
As we mentioned above, stereo and compound microscopes are quite different. Therefore, make sure that your applications are suitable for stereo microscopes.
Stereo microscopes are particularly useful for biologists and medical doctors performing micro-dissections, technicians repairing circuit boards, paleontologists examining fossils, or anyone who needs to work with their hands or tools on small objects, but large enough to be seen or handled without the aid of a high power compound microscope. Thus, stereo microscopes have a very broad set of potential applications across many industries.
2. Magnification
There are two main types of stereo microscopes based on magnification — fixed power and zoom power.
Fixed power stereo microscopes have a set number of fixed position objectives and offer only the magnification options listed on the objectives; nothing in between. They are easy to use (you don’t need to worry about focusing), but at the same time, lack of flexibility. Sometimes, you may see a “Dual power” stereo microscope. It means a fixed power stereo microscope with two levels of magnification (commonly, 10x/30x or 20x/40x). Simply rotate the objective housing to click into the desired level of magnification. The dual power microscopes are excellent starter microscopes with more affordable price, without sacrificing optic quality.
On the other hand, zoom power stereo microscopes have much greater flexibility because the objective lenses can be moved closer or farther from the specimen. This allows a range of magnification options within the maximum and minimum values of the microscope, such as 6.5x through 45x. They require finer levels of refocusing when changing magnification values, therefore, making it a bit harder to use but offering much greater flexibility in terms of how much working distance, magnification, and field of view.
3. Barlow Lens
Barlow Lens is an optimal accessory to change the magnification power of your stereo microscope. It can work for both an increase or a decrease in magnification. For example, a 2x Barlow Lens can double the magnification power in order to see smaller detail. A 0.5x Barlow Lens will reduce the magnification half but enlarge the field of view (or have a wider view).
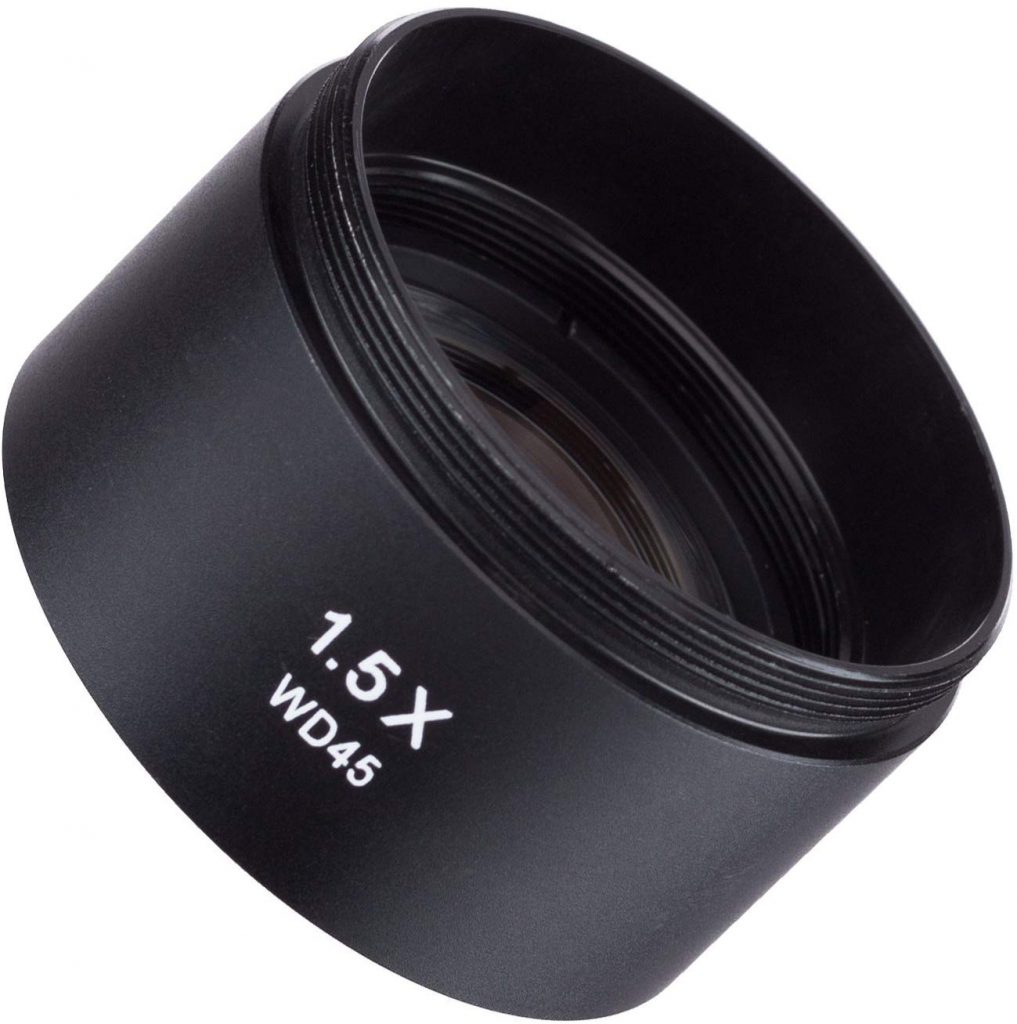
[In this figure] Barlow-Lens
4. Other considerations
Like choosing compound microscopes, pay attention to the seller’s customer service and repairs policy when you purchase stereo microscopes.
How about Microphotography: Cameras & Videos
When I see something amazing under the microscope, I want to document it and share the excitement with others. If you have the same feeling as mine, welcome to the playground of Microphotography.
There are several solutions for capturing images and videos under either compound or stereo microscopes. For beginners with a Monocular or Binocular microscope, you can purchase an adaptor to mount your DSLR Camera to the ocular port (after removing the eyepieces). Make sure the adaptor can fit both your camera and microscope.
Smartphone adaptors/holders are also new options. If high-quality images are desired, a microscope with a trinocular port is a must. Usually, the seller of trinocular microscopes will also carry USB or HDMI cameras as accessories. USB cameras may require a computer to interface with and include advanced software capable of recording, measurement, calibration, and other forms of image analysis. You can also use an adaptor to mount DSLR Camera to the trinocular port, particularly useful for owners of high-end cameras or professional photographers.
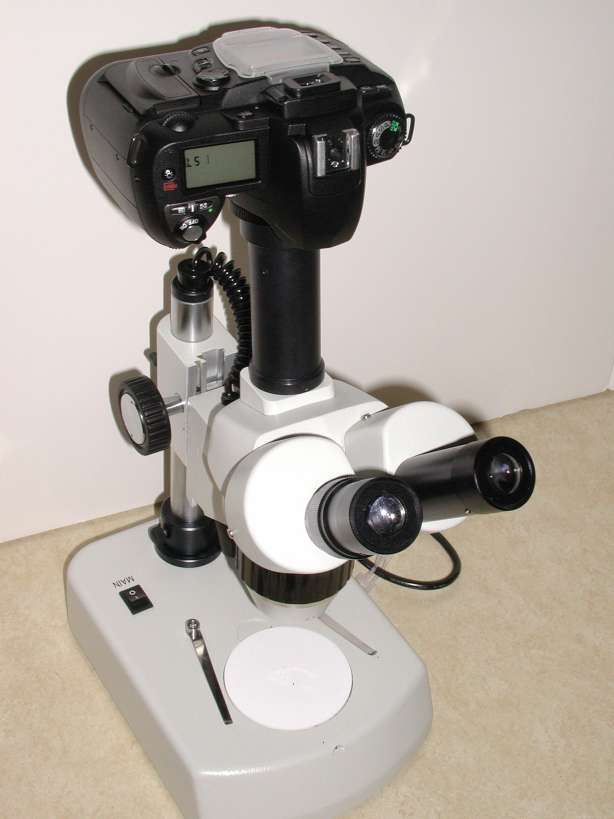
[In this figure] Mounting a Nikon D70 DSLR camera to a stereo microscope.
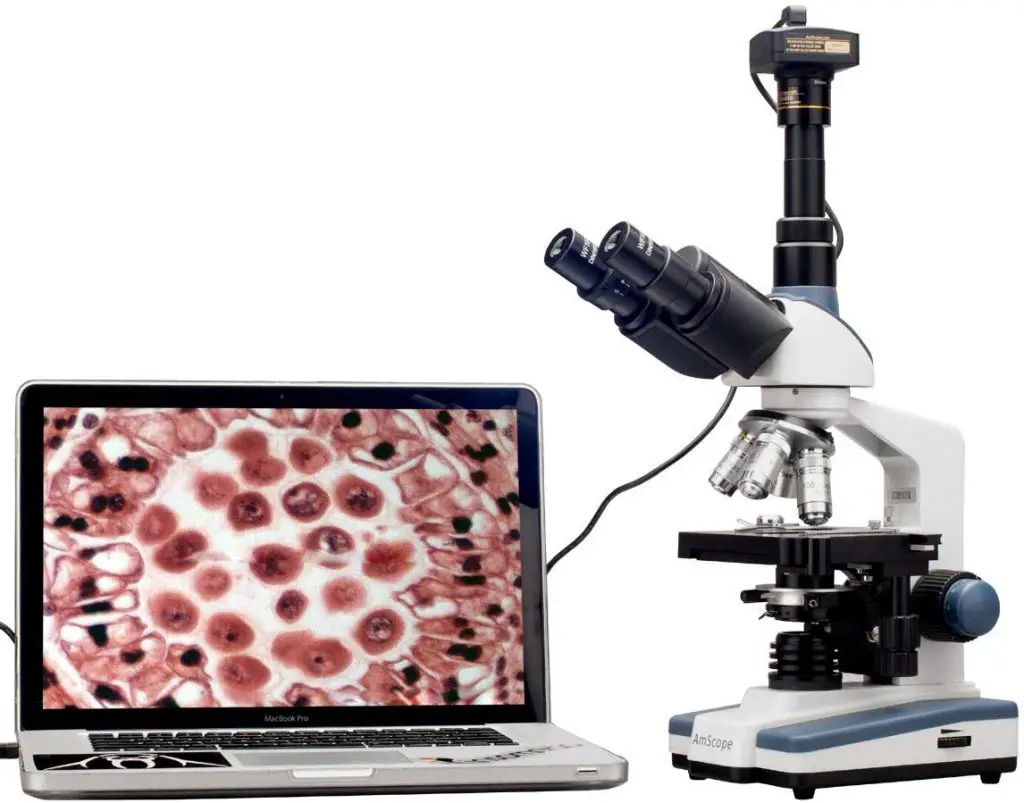
[In this figure] A package of Trinocular microscope with a CCD camera connected to a laptop
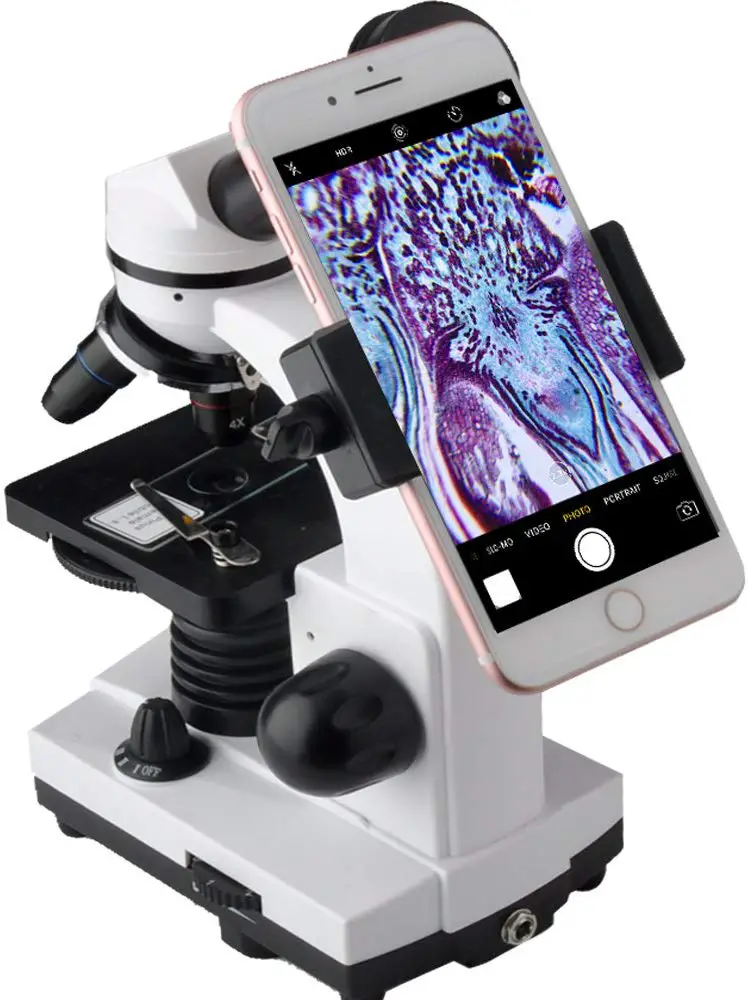
[In this figure] A iPhone holder attached on a Monocular compound microscope
Key takeaways
Think about your applications. What type of samples you would like to see?
It’s better to use a compound microscope to see something small and thin, such as protozoa in the pond water, blood smear (blood cells), mouth swab (cheek cells), thin plant and tissue sections, pollens, cells, bacteria, semi-transparent water organisms (like water bear or algae) and premade slide sets. You can achieve much higher magnification with a compound microscope.
For the stereo microscope, suitable samples are insects, feathers, leaves, rocks, gems, coins, and stamps. Imagining the stereo microscope as a high power magnifier, you cannot achieve as high magnification as the compound microscope. Instead, you can see the 3D and the texture of the object. The image is much closer to the real object.
What would you like?