
(update 6/07/2020)
A good microscope is a significant investment in your science tools. To keep it function properly and to extend its lifespan, a good cleaning routine and maintenance are required. These 13 tips below are based on our 10+ years of experience using an optical microscope in the lab.
Note: These tips are ideal for a regular optical microscope. They may not apply to the pocket microscope or the USB digital microscope.
This article covers
Tip 1: Handle the microscope with care
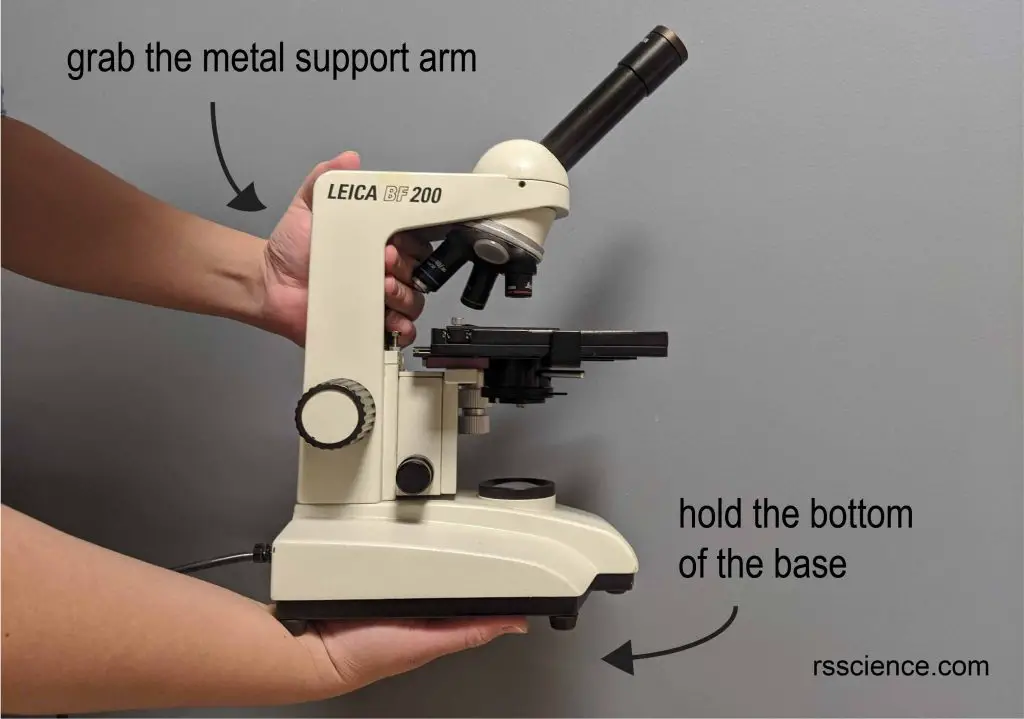
The microscope is a dedicated optical instrument with several lenses in its perfect alignment. Most microscope problems occur as a result of improper handling. When you pick up the microscope and walk with it, grab the metal support arm with one hand and place your other hand on the bottom of the base.
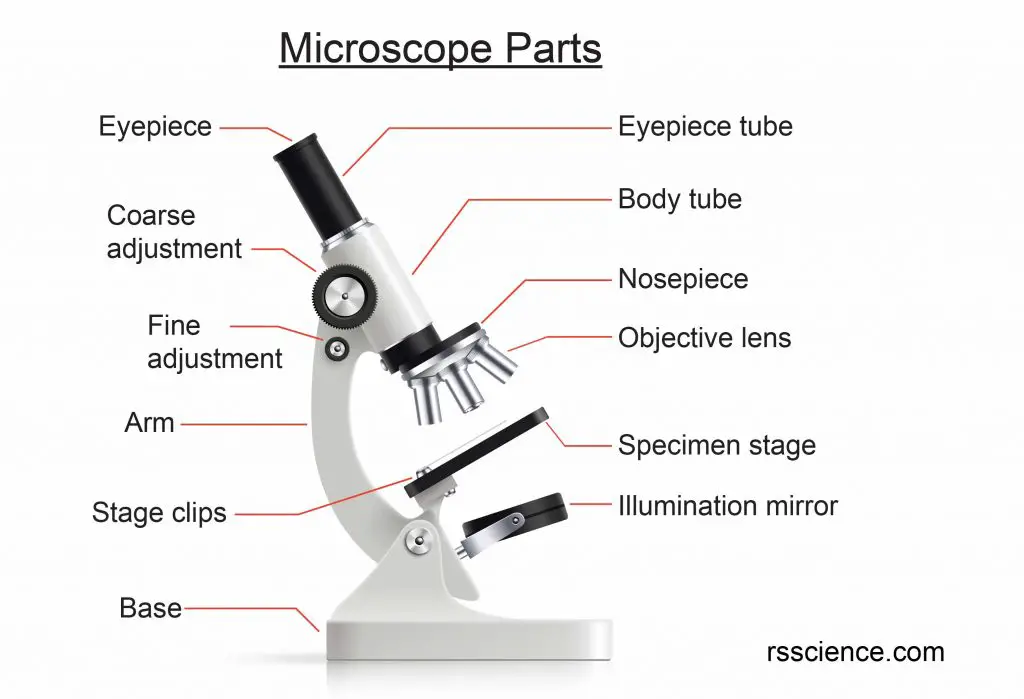
Do not pick it up by the specimen stage (the flat plate where the slides are placed for observation) or the eyepiece holder. Also, do not pick it up just using one hand. When transporting it, use a microscope bag or a box. Always handle it with care and do not shake, toss, stack, or swing the microscope.
Tip 2: Choose a proper place to work with your microscope
Place the microscope on a flat, level, firm bench, free from vibration. At higher magnification, very small movements of the bench will cause large movements in the image being viewed by the user. Consistent vibration can also damage the moving parts of your microscope. Place the microscope in a position where there is enough space for the user to place his or her legs fully under the bench. Preferably use height-adjustable chairs. Save the space for the power cord. Do not place the microscope in front of a brightly lit window. Place it in front of a wall or a darkened window.
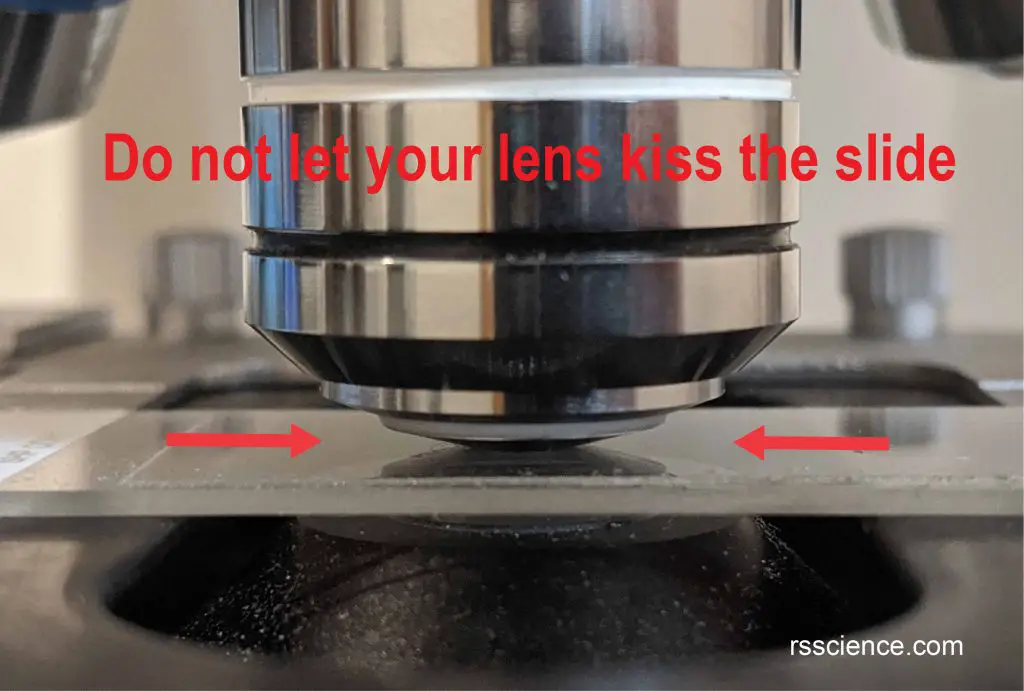
Tip 3: Do not let your lens kiss the slide
The Microscopic objective lens can be very expensive to replace so you should pay additional attention to it. When you move to a new objective lens, you need to lower the objective lens down as far as it can go. Then use the coarse and/or fine adjustment to move it up until the image is focused.
Never allow the lens to touch the slide that you are looking at. The slides which are made of glass are as hard as your lens and they can cause a permanent scratch on the surface of the lens. The tip is adjusting the focus slowly and always keep your eyes on the distance between the tip of the lens and the slides. When you use a high magnification (63x or 100x) objective lens, always use the fine adjustment knob instead of the coarse adjustment knob to focus. Remember switching to the lowest objective lens after the last usage and before a new usage.
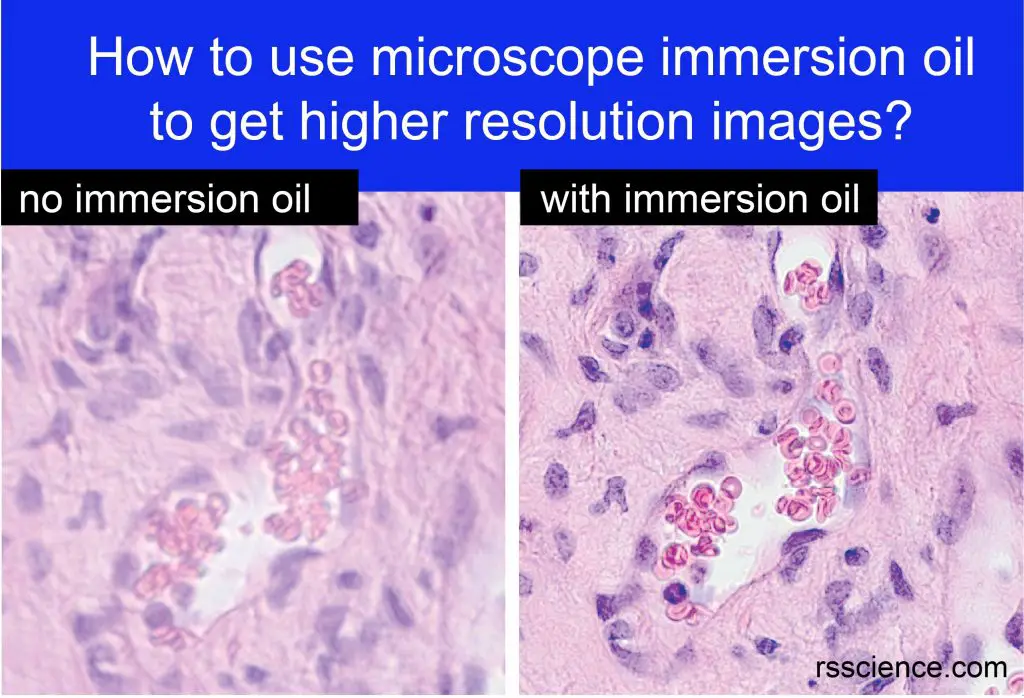
Tip 4: Clean immediately after using immersion oil
Oil immersion is a technique used to increase the resolving power of a microscope. Both the objective lens and sample are immersed in a transparent oil of high refractive index so that high magnifications can be achieved while still maintaining good resolution (for more detail, please click here).
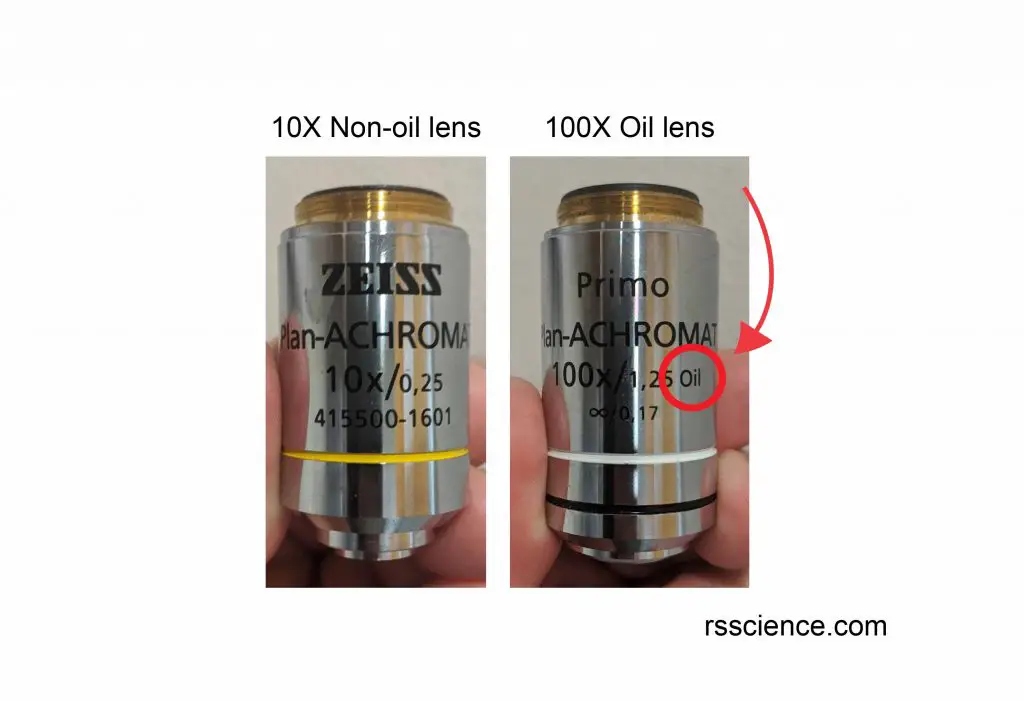
Not every lens can be used for oil immersion. Usually, only a high magnification lens (higher than 40x) is designed to work with immersion oil. You can see “OIL” label on the side of these kinds of lens. If using immersion oil, always ensure the objectives are cleaned immediately after use.
Make sure you choose the good-quality immersion oil, lens paper, lens cleaner, and know how to use it (for how to use microscope immersion oil and clean oil lens, click here). Objective, eyepieces and condenser can be removed for cleaning. However, do not use organic solvents that may damage the coating on the lens.
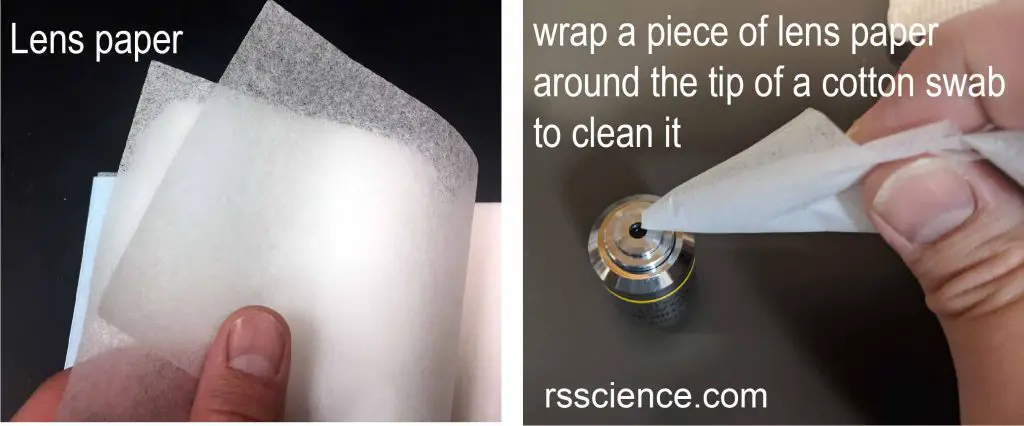
Tip 5: Only use special lens paper or wipes to clean the lenses
Microscope lenses can be easily scratched and should be treated with great care. To remove dust, use an air blower (can be found in a camera cleaning kit) carefully without touching the lens. The sticky residue (like oil stain or fingerprint) can be removed with a special lens paper moistened with distilled water or lens cleaning solution and rubbed gently using a circular motion from the center to the edge. You can wrap a piece of lens paper around the tip of a cotton swab to clean it as well.
Never clean lenses with alcohol, ordinary tissues, cleaning paper, toilet paper, cotton wool or hand towels, which can scratch the lens surface. Never use sharp instruments or anything abrasive on the microscope lenses. Never touch the lenses with your fingers. Your body produces oil that smudges the glass. This oil can even etch the glass if left on too long.
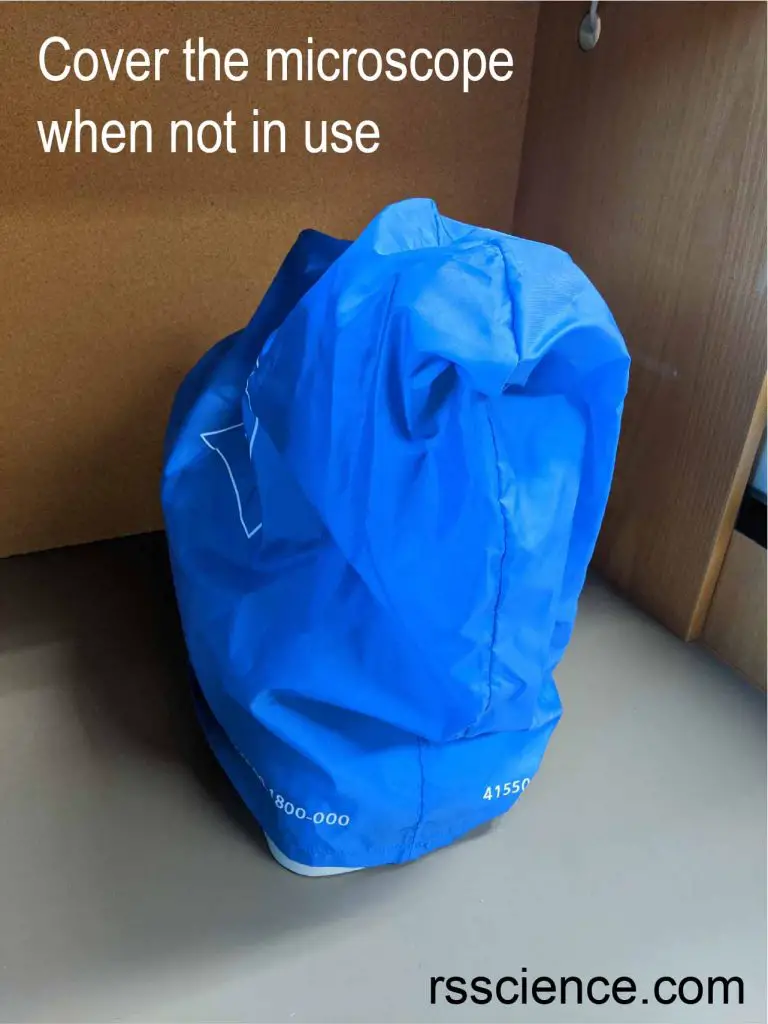
Tip 6: Cover the microscope when not in use
Do you keep the dust cover with your microscope?
Whether transporting or storing your microscope (even stored in a cabinet), always keep your microscope covered. Why? Because your microscope is a complicated optical instrument that includes several lenses, filters, mirrors, and condensers aligned in a closed system. Any dust fallen in the light path will interfere with the quality of microscopic images (ie. unwanted defects or shadows). Especially, eye tubes need to be kept free of dust so do not store a microscope without the eyepieces.
If eyepieces or objective lenses need to be changed, do it carefully and quickly in a clean room (like how you handle the traditional film camera). If the microscope eyepieces must be removed, cover the tubes with caps or a plastic bag with a rubber band around the eye tube to prevent the internal optics from exposing to dust and fungi. If you find any specks of dust in your microscope, DO NOT try to open your microscope by yourself! Always contact the store where you purchased the microscope and ask professional technicians to fix it.
Tip 7: Store your microscope in a clean, dry place
Make sure you store your microscope in a clean, dry space with good air ventilation. Moisture may corrode the metal parts of your microscope and allow mold to grow inside the microscope. Salt air or damp can also cause damage to the equipment over time. Similarly, keep your microscope away from areas with potentially corrosive chemical fumes. Such fumes can destroy lenses or corrode metal parts. Also, place your microscopes on a stable surface and avoid any consistent shake.
Tip 8: Look after the bulb
After using your microscope, turn off the illuminator and wait for it to cool down before putting on the dust cover. Allowing the bulb to cool will extend its lifespan and avoid the unnecessary cost of expensive replacements. Do not switch the microscope on while using full light intensity (the bulb will overheat and blow). Never touch the bulb with your fingers (your body oil will damage the bulb). Use a tissue if you need to handle the bulb. If you may not use the microscope soon or later, unplug the microscope to protect it from a power surge.
Tip 9: Keep the User’s Manual and wrenches in a safe place
Your microscope should come with a user’s manual and special wrenches as required. Keep them in a safe and easy-to-find place. Always refer to the manual when making any adjustments to the microscope and use the supplied wrenches. Never use force, inappropriate tools or over-tighten when performing any maintenance or adjustment to your microscope. This will only result in equipment damage.
Tip 10: Perform an annual maintenance check
An annual maintenance check of microscopes is always a good idea. Moving parts should be inspected, cleaned and lubricated. Clean grease and dirt from sliding surfaces using a clean cloth. Check the objective lenses and eyepieces for oil stain or dust. Inspect the power cords and plugs for safety and stock up on a supply of replacement bulbs, lens paper and cleaning solution.
Tip 11: Have your microscope serviced professionally
Contact the store where you purchased the microscope to see if they provide maintenance service. A good practice is having a professional check and service every 200 hours of use or every 3 years, whichever comes first. Also, ask for professional help if any part of the microscope is broken.
Tip 12: Make sure everyone knows the rules
If the microscope belongs to a classroom or laboratory with multiple users, make sure everyone is on the same page. A new user orientation with consistent follow-up is a good idea. You can also print out this guide and keep it next to the microscope to remind every user. If the space is available, you can also print out a general practice guide and post it on the wall, like “Rule 1: When you are finished with your “scope” assignment, rotate the nosepiece so that it’s on the low power objective, roll the nosepiece so that it’s all the way down to the stage, then put the dust cover.” Assigning a specific person to do a routine maintenance check and answer the user’s question (to prevent confusion or misunderstanding) is also a good practice.
Tip 13: Safety first
Don’t forget to protect yourself when using the microscope. Be careful with the slides and coverslips. They are made of glass and if broken, you will get cut and bleed. The power source and connections to the microscope should be secure and stabilized and not expose users to a risk for electric shock. Care should be taken to prevent damage to the eyes from exposure to the high light-intensity halogen lamp. The microscope should be used ergonomically to prevent back and neck strain.
Related posts
How to Choose the Right Microscope (Compound Microscope vs. Stereo Microscope)