
Do you face the problem of uneven illumination when you are viewing your microscope? If so, you may need to align your microscope by the procedure of “Kohler illumination”. Sounds complicated? Don’t worry, read this article and we will show you how to do it step-by-step.
This article covers
What is Kohler illumination?
Optical microscopes generate the magnified images through the interaction of visible lights and the specimens. Illumination of the specimen is the most important variable in achieving high-quality images in microscopy. However, the light source (i.e., a halogen lamp) used for our microscopes is not homogeneous. Without an adjustment, the light intensity in the center will be much stronger than in the peripheral regions. As a result, the edge of the view field will be dim looking like under a shadow.
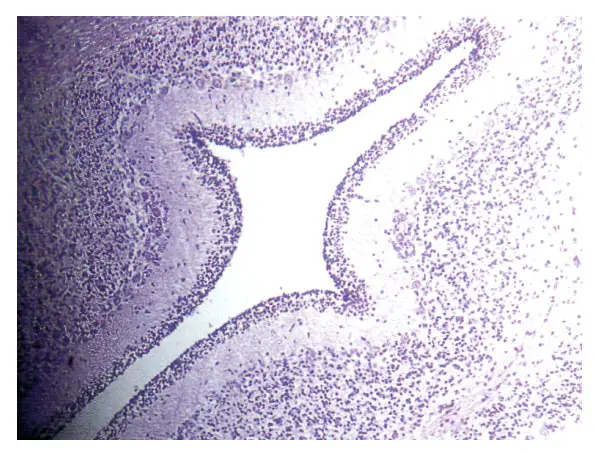
[In this figure] An example of uneven Illumination.
Photo source: https://academic.oup.com/labmed/article/28/11/719/2503687
To solve this problem, August Köhler of the Carl Zeiss corporation (yes, the company selling high-end cameras and microscopes today) first introduced a method called “Köhler illumination”. Kohler illumination ensures even illumination of the specimens. This reduces image artifacts and provides high sample contrast.
If you are interested in its detail of optical principle, see this link.
Is my microscope compatible with Kohler illumination?
Köhler illumination requires several optical components to function. Most regular compound microscopes with the Abbe condenser and Iris diaphragm should be able to do so.
These components lie in order between the light source and the specimen to control the illumination of the specimen:
1. Collector lens and/or field lens – collect light from the light source and focus it on the plane of the condenser diaphragm.
2. Field diaphragm – control the size of light beam from collector lens.
3. Condenser diaphragm – control the size of the light beam into the condenser lens.
4. Condenser lens – project the light beam, without focusing it, through the s specimen.
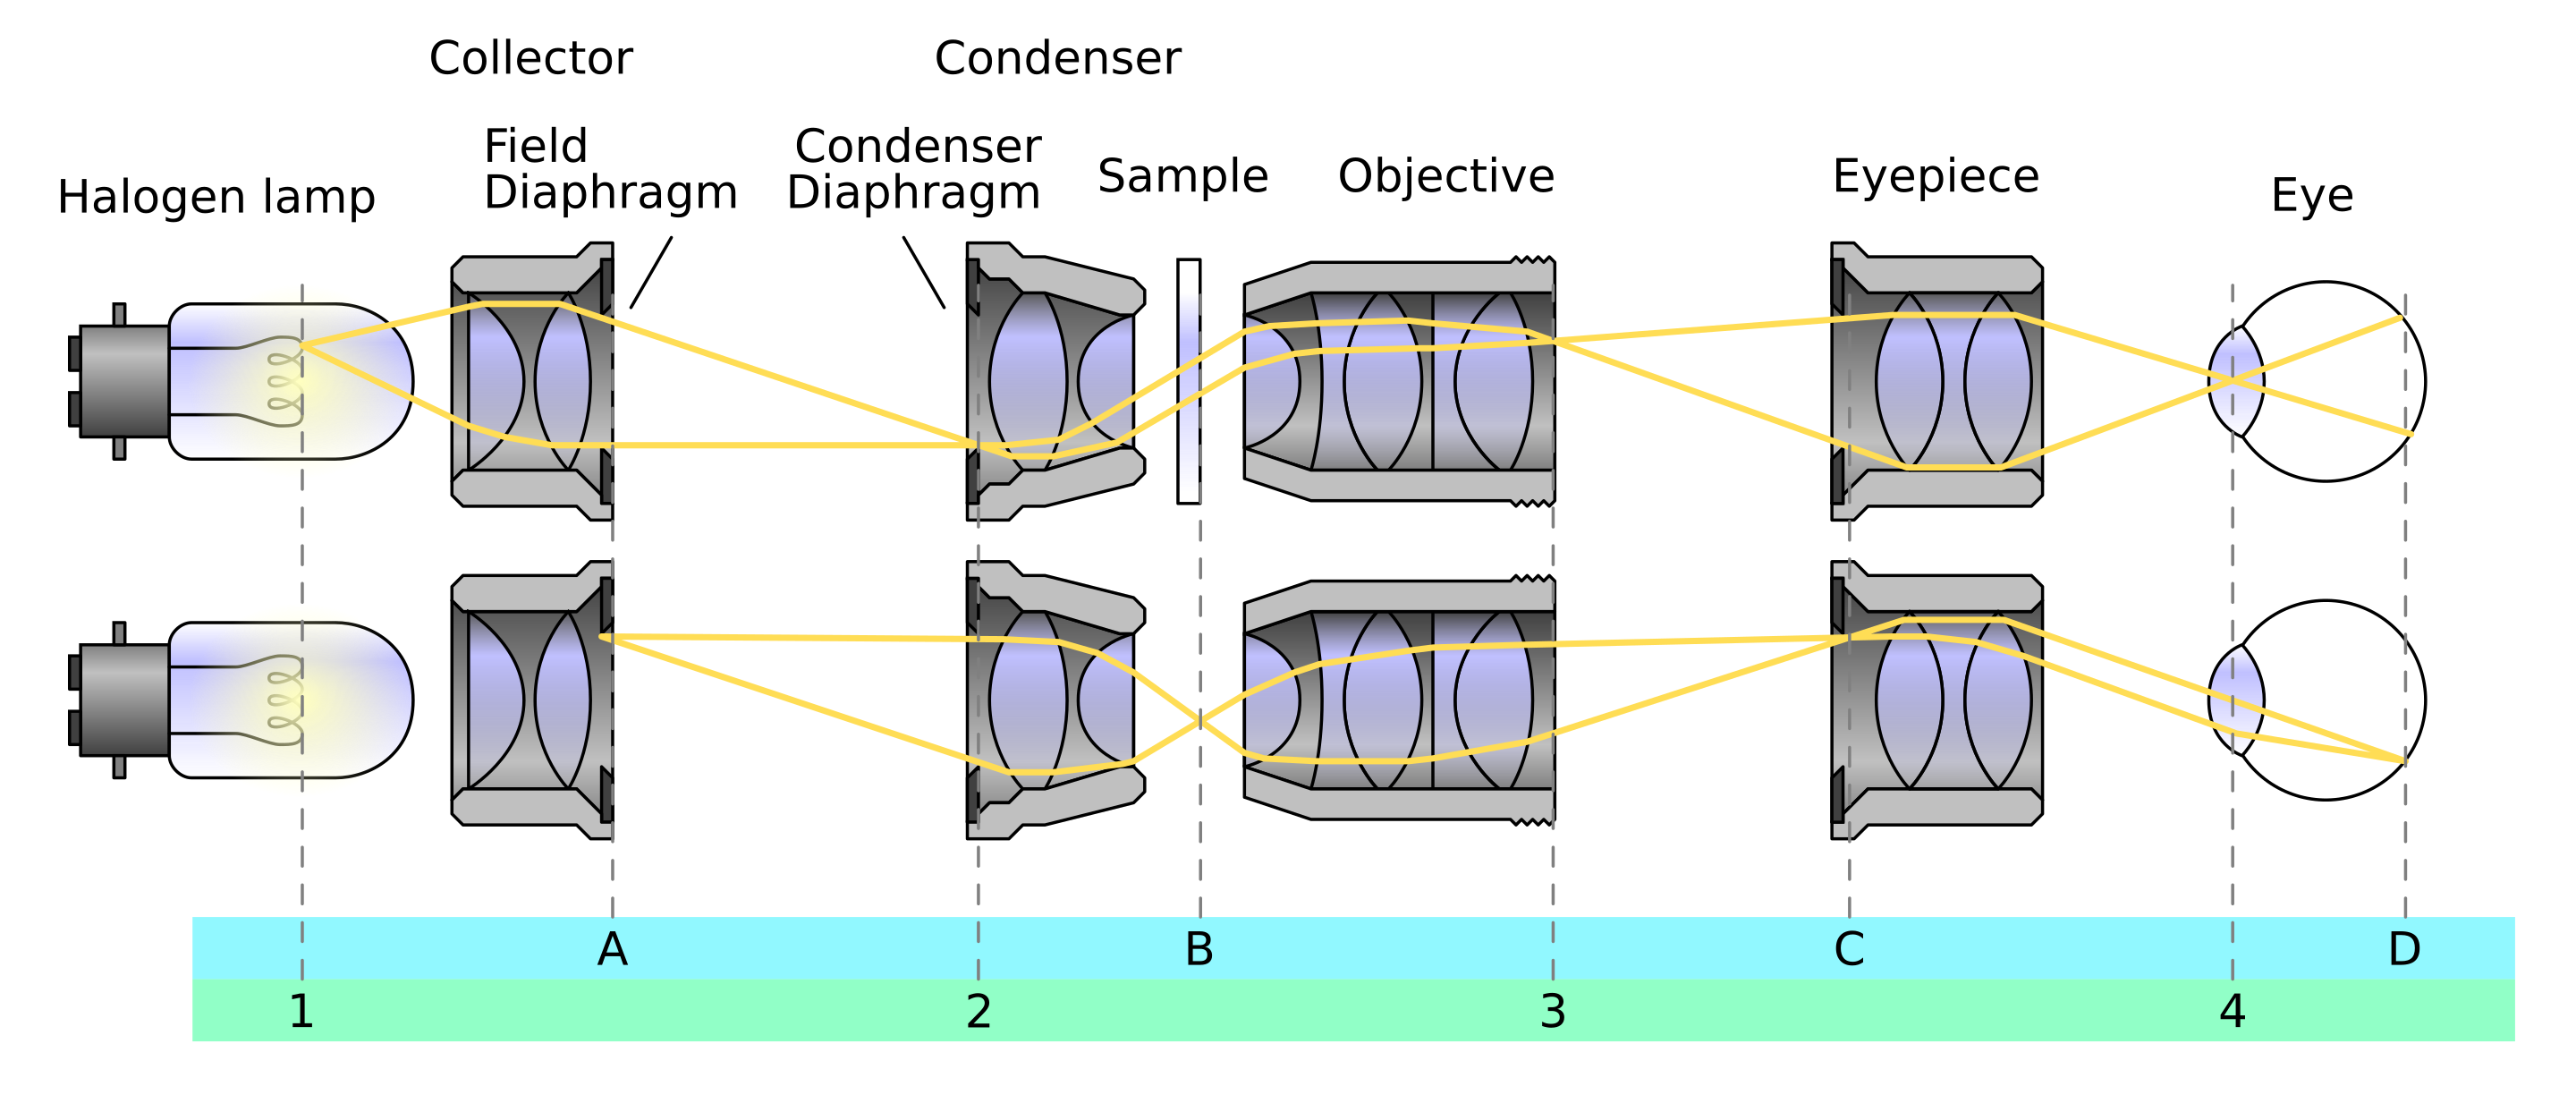
[In this figure] Schematics of Köhler illumination.
Photo source: https://en.wikipedia.org/wiki/K%C3%B6hler_illumination
This technique is recommended by all manufacturers of modern microscopes because it works very well. Let’s learn how to calibrate “Kohler illumination” to realize your microscope’s full potential.
How to set up Kohler Illumination?
Note
a. You may need to establish Kohler illumination each time you change the objective.
b. This procedure is the same for all microscopes. All the components that need adjusting are “below the stage of an upright microscope” or “above the stage of an inverted microscope”.
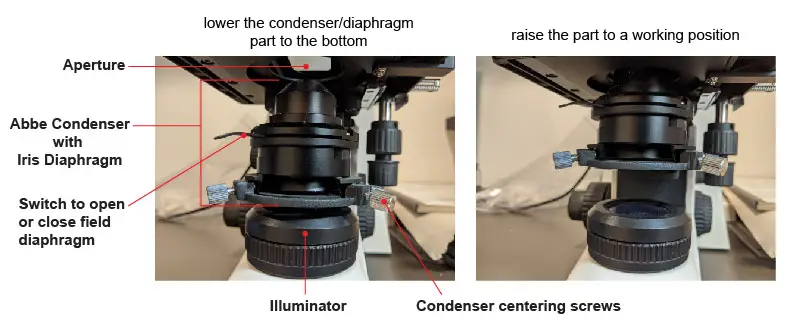
[In this figure] The condenser/diaphragm part below the stage of an upright microscope is where we need to adjust for Kohler illumination. This example is a Primo Star Laboratory microscope from Carl Zeiss.
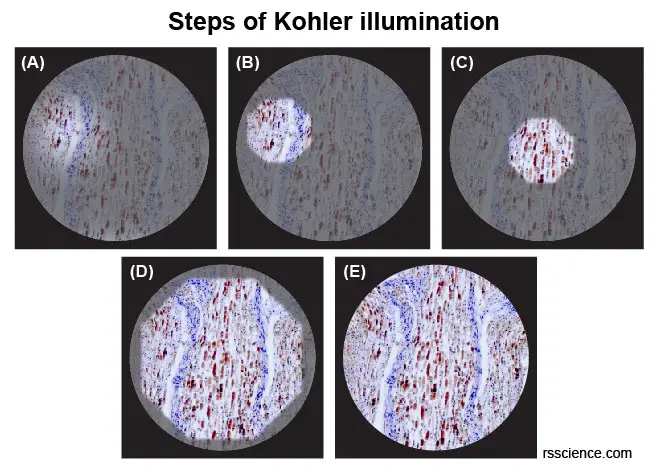
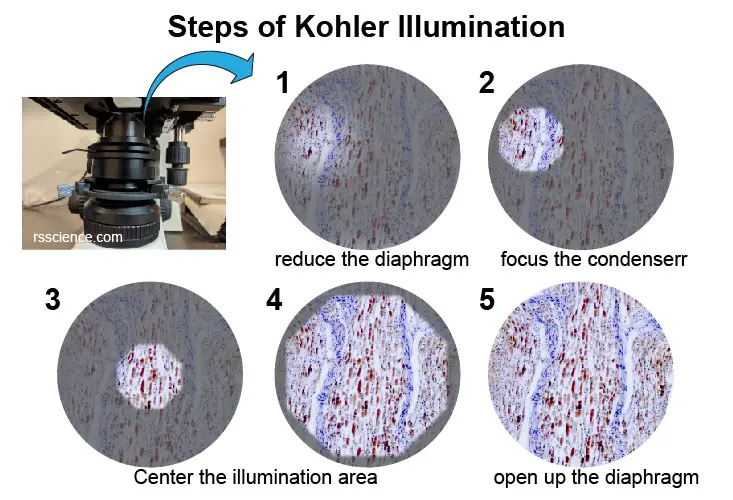
[In this figure] What you will see under the microscope at each step of Kohler illumination.
Procedures and steps
1. Rotate the turret of the condenser to the brightfield aperture, which should be open and not house a filter or prism.
2. Choose a suitable specimen (well-stained brightfield samples, such as very thin animal or plant tissue).
3. Focus on your specimen using transmitted light.
4. (Image A in the above figure) Close down the field diaphragm, you should see an octagon-shaped aperture appear (or if it is really badly out of focus, the entire image will get darker). Close the aperture until it occupies about 70% of the field of view.
5. (Image B) Focus the condenser with the knobs that raise/lower the entire condenser, the octagon shape should be made as sharp as possible.
6. (Image C) Move the octagon shape using the two centering screws to the approximately central point of the viewing field.
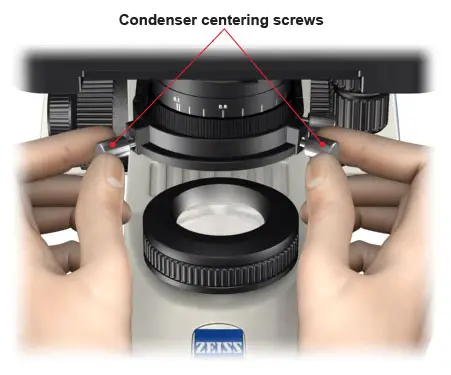
[In this figure] Align the condenser by adjusting two centering screws.
Photo source: Zeiss.
7. (Image D) Open up the diaphragm to illuminate ~90% of the view. Center the octagon shape by fine tuning the centering screws.
8. (Image E) Open the diaphragm until it is just illuminating the entire view or camera area.
9. Adjust the condenser aperture so the contrast of the image is good.
Enjoy your exploration under the realigned microscope!
Q&A:
Does Kohler illumination require for phase contrast microscopy?
Yes, uniform illumination of the sample is also critical for advanced illumination techniques such as dark-field, phase contrast, and differential interference contrast (DIC) microscopy.