
This article covers
What is scale casting?
Scale casting is a very useful technique in biology, botany, paleontology, and even forensic science. Generally speaking, scale casting uses a molding material (like glue) to make a replicate of the surface that you want to investigate. A good scale cast can preserve every tiny detail of the surface texture (called “microtopography”) so that you can study it under a microscope.
Here, I will show you how to use the tools you can easily find in your home to make a simple, but professional scale cast. I will show you two examples: (1) the underside of the leaf and (2) the surface of the hair.
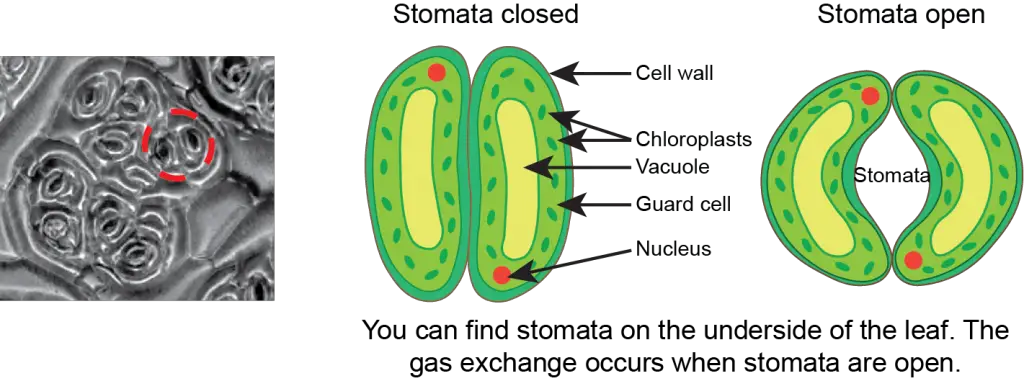
For example (1), it is a common technique for the botanist to study plant cells, especially the stomata that facilitate gas exchange. For example (2), the scale casting of hairs is very useful for biologists or forensic investigators to identify the origins (human or animal) of the hairs.
1. The underside of the leaf
How to do scale casting with clear nail polish
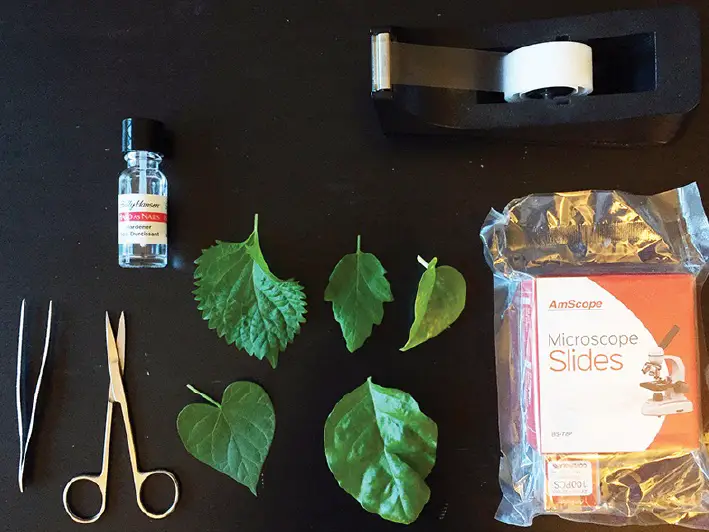
- Prepare the tools, including clear nail polish, clear adhesive tape, tweezers, microscope slides, several kinds of leaves, and some hairs.
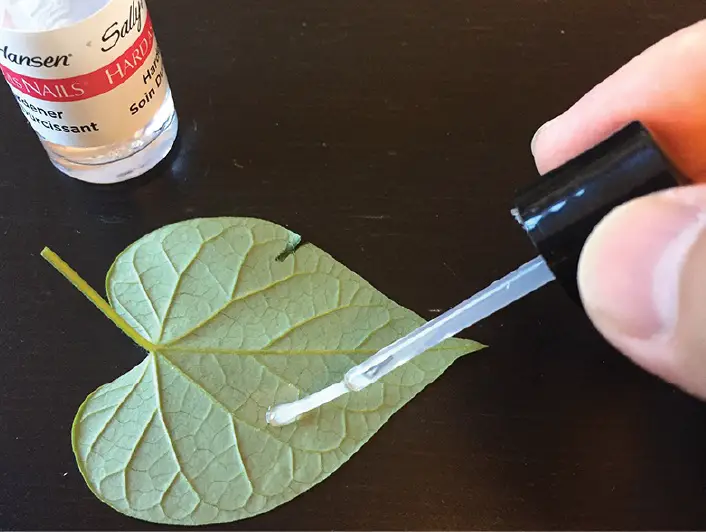
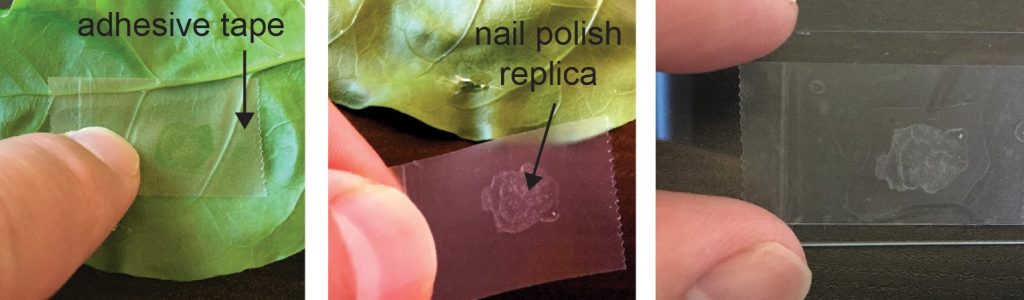
- Start with one of the fresh leaves. On the underside of the leaf, paint a fingernail size of the patch with clear nail polish.
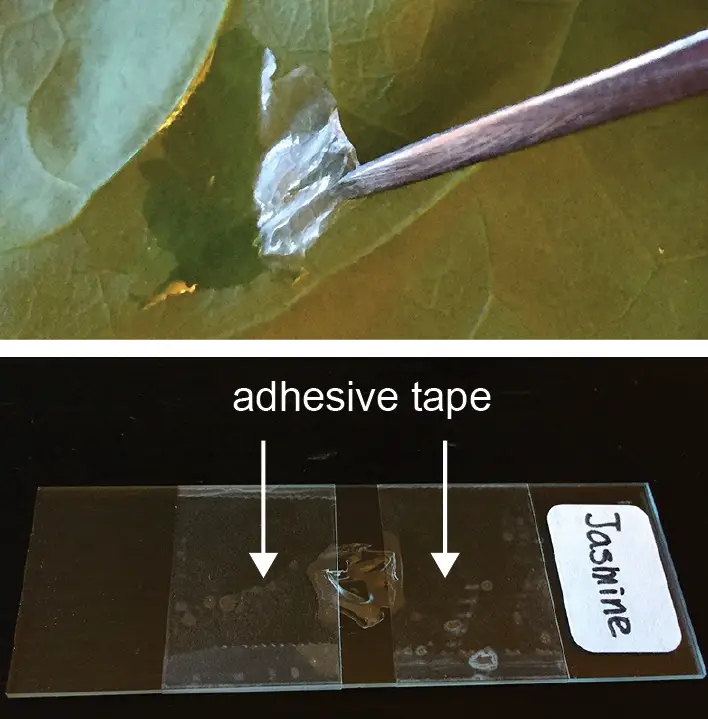
- Wait for 10 mins or longer, allowing the nail polish to dry. There are two ways to peel off the dry nail polish replica. The first method is using a sharp object (a needle, a tweezer or a blade) to start peeling away the nail polish. The thin film of nail polish is then carefully transferred onto a microscope slide and pressed against the glass to reduce warping. Use adhesive tape to fix the nail polish film.
Bonus tips
It could be more difficult to peel off the nail polish from some surface (for example, fuzzy leave). In this case, after the nail polish has dried, place a piece of clear tape that is slightly larger than the size of the painted patch over the nail polish and gently press down to allow the nail polish to adhere to the tape. Gently peel off the tape, and place its tacky side down on the microscope slide.
What do you see?
Now, it is time to look at your nail polish replica under the microscope. Try different magnifications to see which one works better. If your microscope has phase contrast or DIC mode, try it and you can see a better 3-dimensional appearance. If not, try to reduce the light intensity to have higher contrast.
2. The surface of the hair
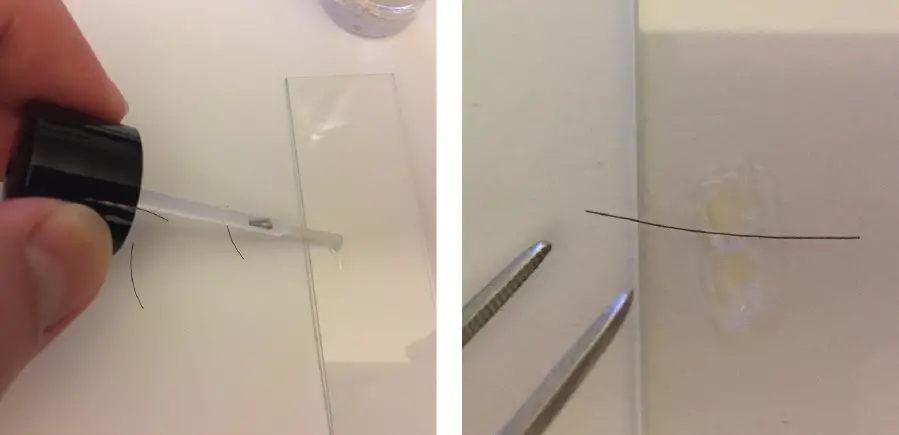
1. To make the scale cast of hairs, first cut the hair specimen into 1-2 cm long. Then paint a fingernail-sized area with clear nail polish on a blank microscope slide. Before the nail polish dried, quickly place the piece of hair onto the nail polish area.
2. Wait for 10 mins allowing the nail polish to dry.
3. Now pull your hair fiber out by using tiny tweezers. The clear replica reflecting the texture of the hair will be left on the microscope slide. Your slide is ready for viewing now!
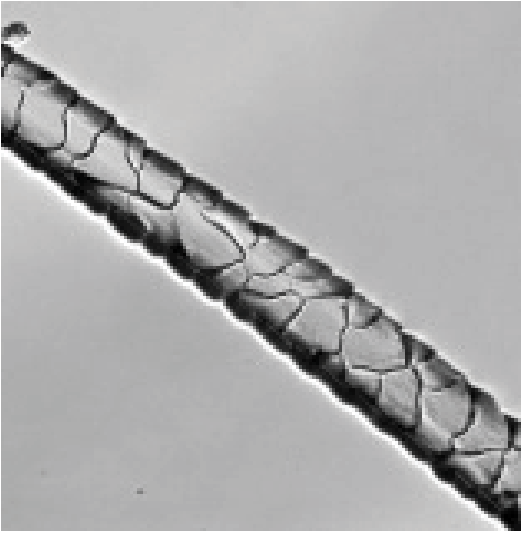
What do you see?
Layer of squama-like texture on the surface of the hair.
What does your scale casting look like? Please share with us below!
Related posts
Lesson 6: Pond Life Hunter & “A World in a Drop of Water”
Lesson 4: How to Use a Microtome & “Amazing Cross-section of a Stem”