
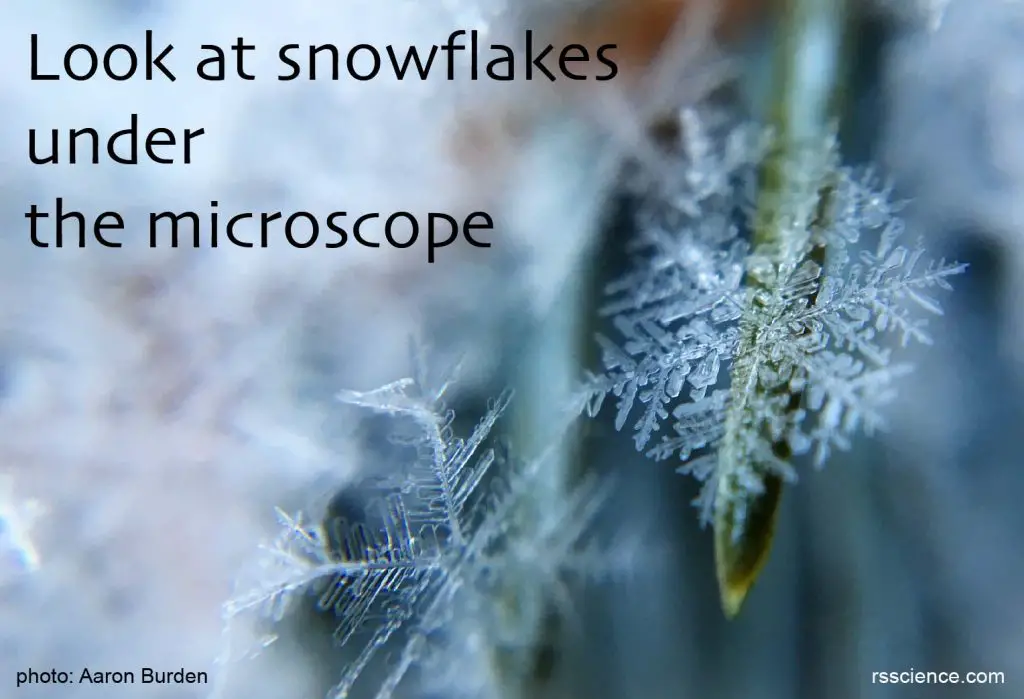
If you live in an area with a snowy winter, you can do more than making a snowman. Snowflakes are the most amazing masterpieces that Mother Nature is showing to us. Let’s learn about snowflakes hands-on by catching, collecting, and observing snowflakes under a microscope.
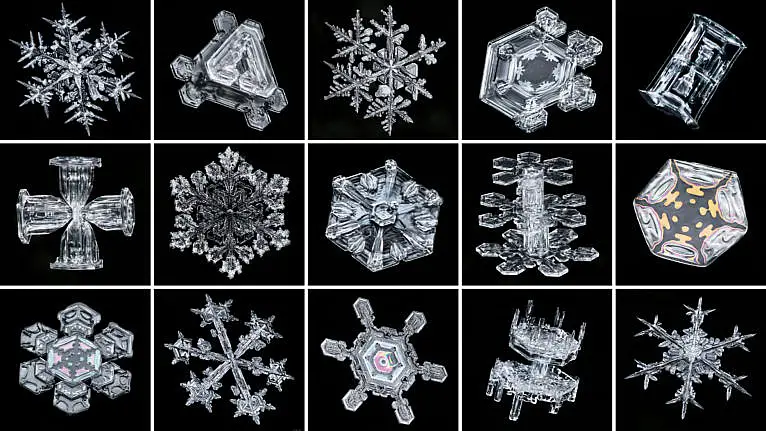
[In this image] Snowflakes photographed by Canadian snowflake photographer Don Komarechka.
Photo source: Sky Crystals, Maclean’s
This article covers
The first man who took the photographs of a snowflake
It’s 1885 in Vermont’s wintry terrain; 20-years-old Wilson A. Bentley was fascinated by white snowflakes falling in front of him. So, he attached a camera to his parents’ microscope to capture a photo of one. After countless attempts, he finally got a clear picture – the first photograph of a snowflake!
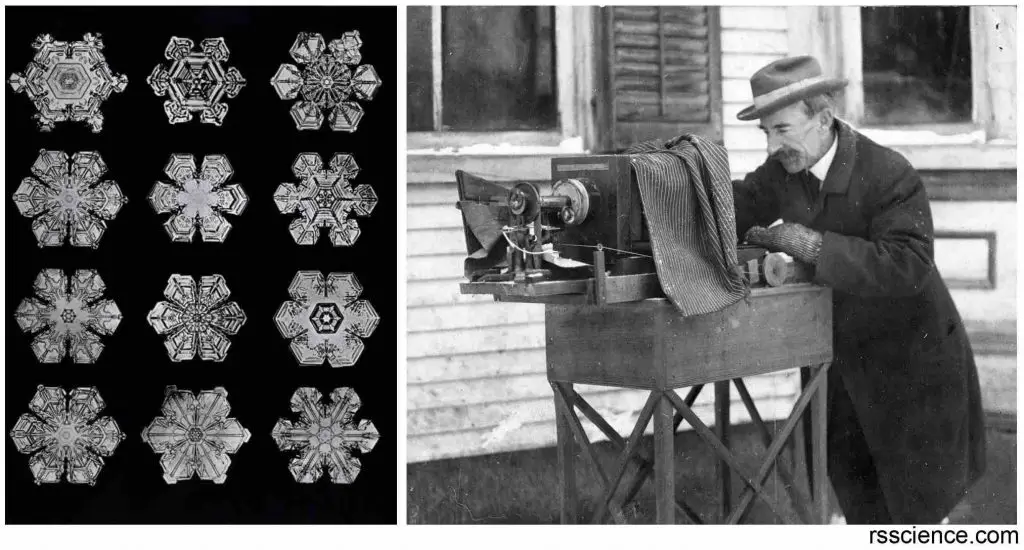
[In this image] Left: Snowflakes microphotographed by Wilson A. Bentley in 1890 and published in the book “Snow Crystals” in 1931. Right: Bentley photographing snowflakes on his farm in Vermont.
Photo source: Snowflake Bentley
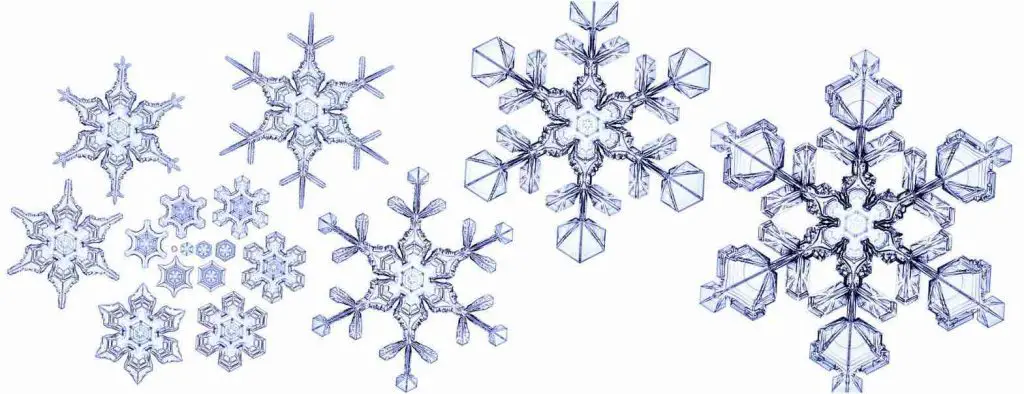
Hundreds of pictures later, Bentley’s collection was full of perfectly symmetrical, yet unique six-sided crystals – which come to be our iconic view of snowflakes. Bentley even coined the famous phrase, “No two snowflakes are alike”.
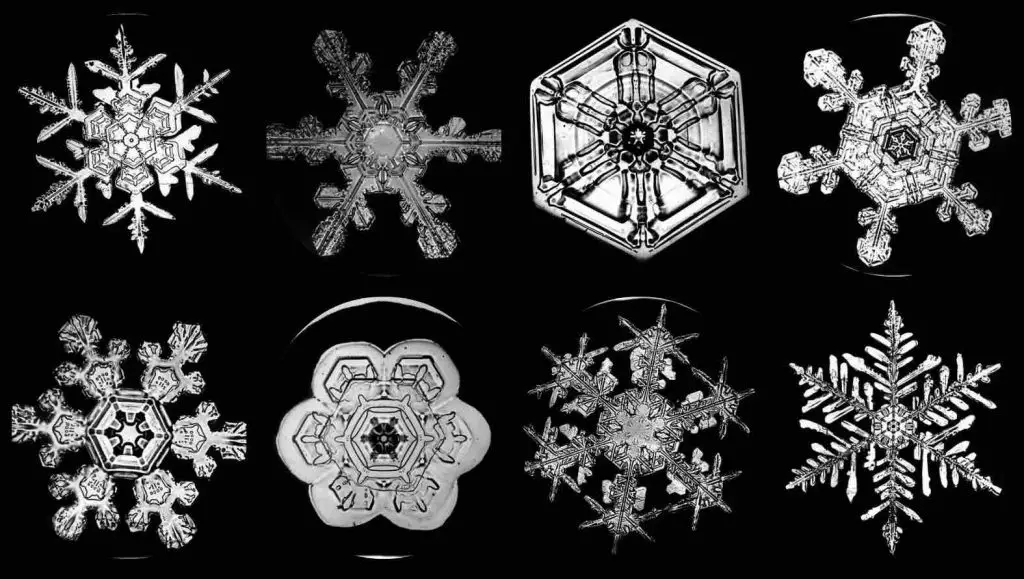
[In this image] Examples of remarkable snow crystals captured by Bentley. He said he never observed two identical crystals.
Photo source: Snowflake Bentley
How to capture and view snowflakes under a microscope
Wilson Bentley photographed snowflakes with his equipment of early cameras and an old microscope from his mother’s school teacher days. It is fair to say that fancy equipment is not the key to capturing a beautiful snowflake, but your enthusiasm and patience are. So, we thought if Wilson Bentley can do it one hundred years ago, so can we!
Tools needed to capture and view snowflakes
Note: You’ll need to gather these items and keep them cold until you are ready to begin.
Microscope – A stereomicroscope (or dissecting microscope) is the best option since it gives you plenty of room to work with the specimen and will provide a whole view of your snowflakes. A stereomicroscope also allows you to view the snowflakes on a piece of black paper which serves as a background to make your snowflakes stand out.
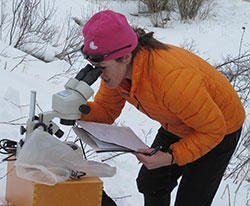
[In this image] A scientist examines the properties of snow using a stereomicroscope in an avalanche safety workshop.
Photo credit: Ron Watters
A microscope with a camera is perfect! If you have a compound microscope, it works as well. Try different color filters and the angles of reflected light to illuminate the snowflakes.
Digital USB microscopes may work as well as stereomicroscopes. However, if the temperature is too low, some electronic devices (including cell phones and cameras) may not work. I tied my digital microscope, see my image below.
Magnifying glass – Before inspecting the details of snowflakes under the microscope, you can use a magnifying glass to select and record your observation.
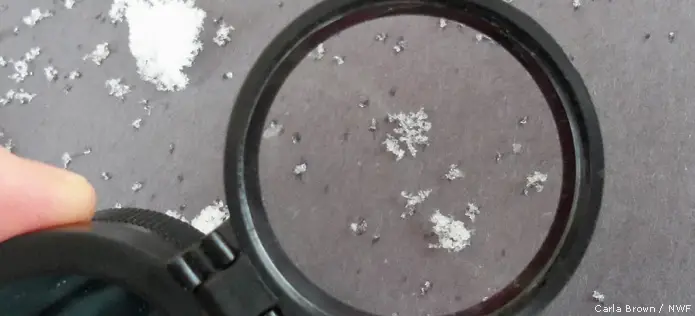
[In this image] Large snowflakes are big enough to be seen with a magnifying glass.
Image source: Ranger Rick
Dark cardboard paper – For collecting the snowflakes and serving as a background for the stereomicroscope.
Glass slides – For holding the snowflakes if a compound microscope is used.
Paintbrush – You can use a paintbrush to carefully pick/select which snowflakes you prefer to view.
Sheltered place and table – You need to be outside for a while to capture the snowflakes you like. So, find a sheltered place with a stable table for your microscope and tools. Cover your microscope if needed since it could be damaged by moisture.
SNOW – Freshly fallen or freshly falling snow is the best. If it hasn’t just fallen, you can usually find snow crystals in dry/fluffy snow, especially when the sun is shining on it. Different weather produces different sorts of snow crystals. If you want to capture perfect snowflakes as Bentley did in his collection, do it on a calm/light snowing day instead of a blizzard day.
Procedures to collect the snowflakes
1. Before starting, chill the collecting paper, glass slide, paintbrush, or any tool you like to use. You can put them outside when it starts snowing. This is an important step to keep these materials cold and prevent them from warming up and melting the snowflakes.
2. To catch the snowflake, you simply place a black/dark paper or cardboard out when it’s snowing. Use a paintbrush to pick/select which one you prefer for preservation. If you use a compound microscope, gently use a paintbrush or cold tweezers to collect the snowflake and place it on the slide.
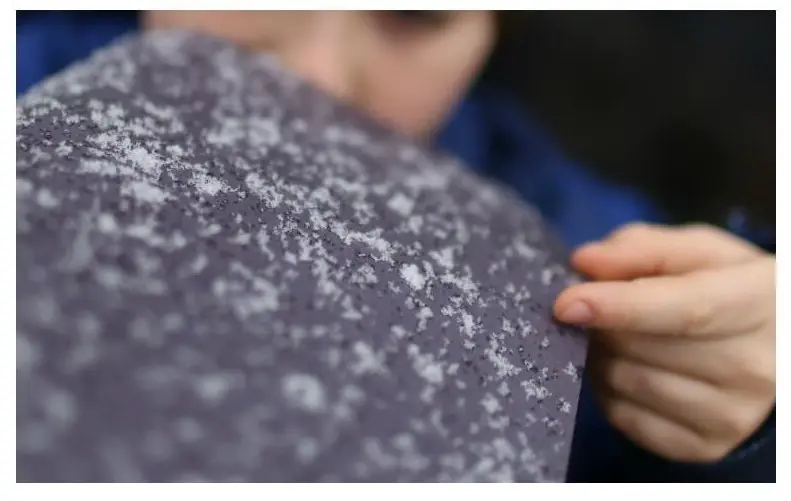
[In this image] Collect the snowflakes falling on a piece of dark paper.
Image source: Lemon Lime Adventures
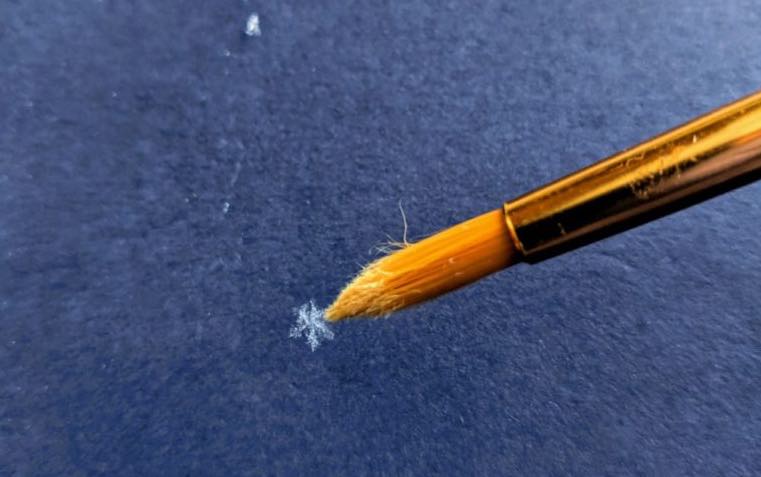
[In this image] Whenever it is snowing, it’s actually fairly dry out, so it’s easy to generate static electricity. You can just rub the brush on your sleeve, and you put the tip of the brush near the snowflake, and it’ll actually hop up onto it.
Image source: Blog She Wrote
3. Collecting the snowflakes can be tricky. It requires patience. During these steps, make sure not to breathe on the snowflakes to prevent them from melting. You can cover your mouth and nose using a mask or scarf.
4. Gently move your specimen of snowflakes under the microscope (on the stage and hold it in place with the clips). Look through the eyepiece and gently move the focus knob until the image comes into focus (until you get a clear image). Move the microscope slide around (by adjusting the stage) to observe all parts of the snowflake structure. Adjust the light source (intensity and angle) to find a good illumination.
5. Record what you observe by drawing on paper or taking a picture (if your microscope is mounted with a camera or cell phone). See if you can observe the intricate patterns of snowflakes. By comparing different snowflakes, you will notice several differences between these patterns (Can you find two identical snowflakes?). Despite the differences, you will notice that all the snowflakes have six sides forming a hexagonal structure. This is due to the manner in which the water molecules join as they form a snowflake.
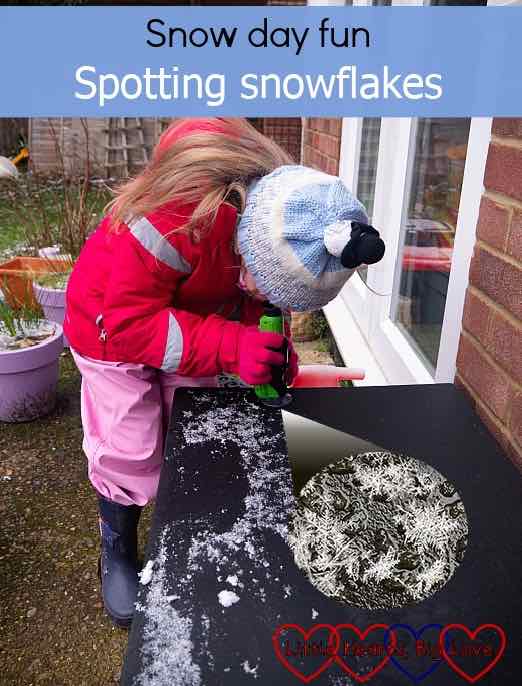
[In this image] Hunting for snowflakes will be an excellent snow day activity for kids.
Image source: Little hearts big love
My own experience
A cell phone is a great tool to take images of snowflakes. It’s quick and easy. I mount my cell phone on a tripod and look at snowflakes falling on my balcony railing.
[In this image] Photos of snowflakes taken by my cell phone – pixel 3.
Fresh snow falling on my balcony railing can stay longer than on paper.
I also let the snowflakes fall on the dark paper, and transfer them to my digital microscope. However, it melts so quickly on my dark paper, so I don’t get enough good snowflakes to image under my digital microscope. I think falling on my balcony railing is great because it is cold enough to preserve the snowflakes. Maybe a metal block is a better tool than paper.
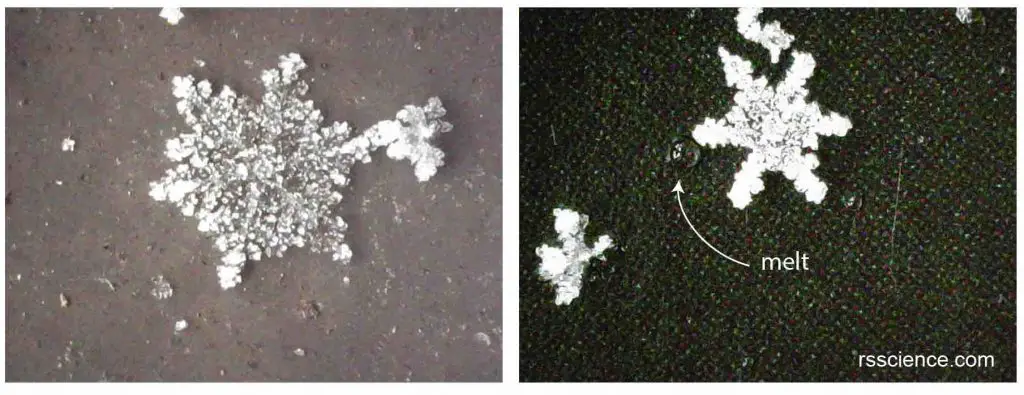
[In this image] Photo of snowflakes taken by a digital microscope.
Fresh snow falling on my balcony railing (left) and on a black paper (right). You can see the snowflake on a black paper (right) is melting.
Preserving snow crystals
It is possible to preserve newly fallen snow crystals as “snow crystal fossils”. These preserved replicas can then be examined by microscope at any time, in a comfortable indoor climate.
How to do it?
1. Go outside with some glass slides, coverslips, collecting paper, paintbrush, and superglue. Let these materials become as cold as the surrounding air.
2. Let snowflakes fall onto the collecting paper. Scan around with a magnifier to find an attractive specimen. Carefully pick the crystal up using a small artist’s paintbrush and place it on one of the slides.
3. Place a drop of cold superglue on the crystal and drop a coverslip on top. Be careful not to melt or otherwise damage the snow crystal in the process.
4. Leave the slide outside or in your freezer for a week or two until the glue hardens.

[In this image] Superglue replica of snowflakes under a light microscope.
Image source: SnowCrystals
5. There is other preservation techniques by using different chemicals. Examples are Formvar replicas (polyvinyl acetal resin) and acrylic replicas (clear acrylic spray paint). See here for more details.
How does a snowflake form?
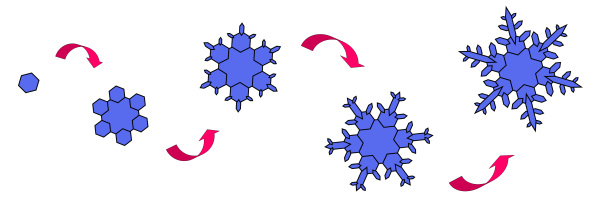
[In this image] Snowflake growth process.
Image source: Snow Crystals
The intricate shape of a single snowflake forms through several steps/phases:
I. Initial ice crystal growth – the beginning of all snowflakes
The first step involves forming a six-sided crystal structure (facet) when an extremely cold-water droplet freezes onto a pollen or dust particle in the sky.
These tiny particles are ice nuclei. Cold water molecules in the cloud come into contact with the ice nuclei and freeze. Since a water molecule is an H-O-H (hydrogen-oxygen-hydrogen) bond with an angle of 104.5°, the frozen water molecules tend to arrange themselves into a lattice structure of hexagonal shape (a process called crystallization). These simple hexagonal plates/facets are that all snowflakes start with, which are also referred to as diamond dust.
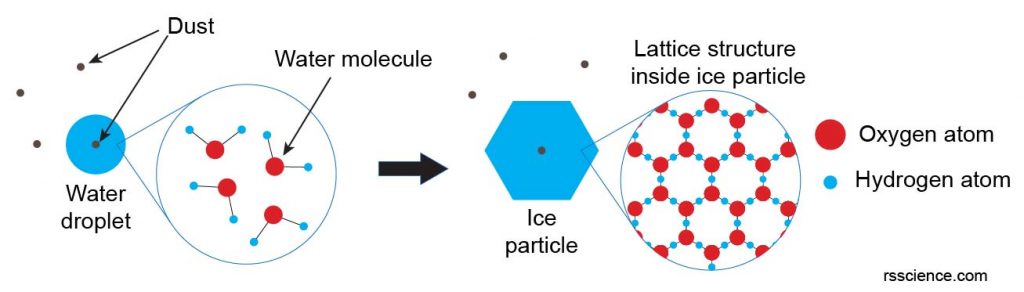
[In this image] Water molecules stick to some small foreign particulates (like dust) and become water droplets (or you can call them “rain”) in the cloud. If the temperature is low enough, frozen water molecules arrange themselves into a lattice structure along with hydrogen bonds, which create the basic hexagonal shape that all snowflakes start with.
[In this image] The six-fold symmetry you see in a snow crystal arises from the arrangement of water molecules in the ice crystal lattice. Oxygens are these bigger blue balls, while hydrogens are smaller yellow ones.
Image source: Snow Crystals
II. Faceted growth – gives snowflakes symmetry
The hexagonal facets keep growing when they encounter more water molecules. Gaseous water vapor skips the liquid phase and deposits directly onto the ice crystal (condensation). Water molecules have higher chances to stick on corners and edges, instead of basal facets, so that the prism facets grow much faster (up to 100 times faster) than the flat/smooth basal face. This is why all snowflakes are flat with a symmetrical hexagonal structure.
III. Branched growth – more complex and chaotic structures
The corners of the hexagonal plates provide more available hydrogen bonding sites for incoming water vapor. As a result, branching occurs on these corners like building the six arms of the snowflake. This growth process is a positive feedback loop; as corners stick out farther and farther, they encounter more water vapor and start growing faster and faster. As the snowflake grows, new smaller branches grow on the existed main branches and so on, creating a very complex structure like an ice crystal with six arms. Because each arm experiences the same atmospheric conditions, these arms usually look identical.
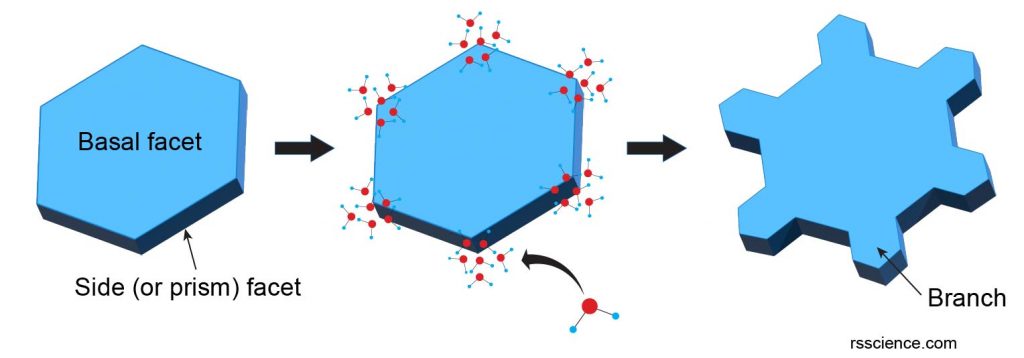
[In this image] As more water molecules accumulate at the corners of the hexagonal plate, the ice crystal starts to branch.
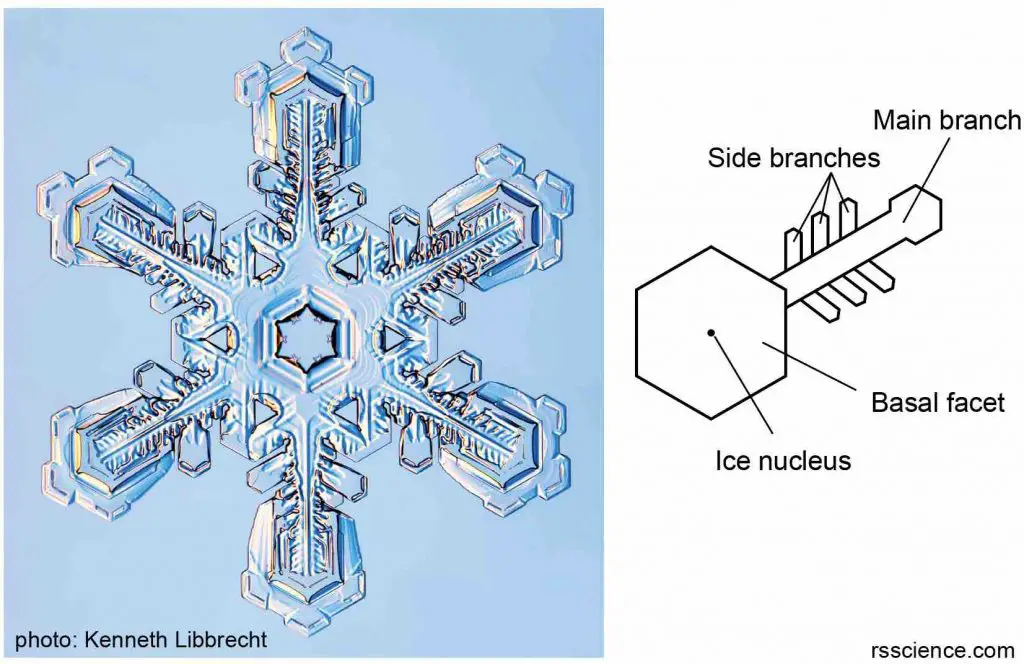
[In this image] The structure of a branching snowflake.
Image source: Snow Crystals
No two snowflakes are the same. Is it true?
The intricate shape of a single arm of the snowflake is determined by the atmospheric conditions experienced by the entire ice crystal as it falls. Snow crystals are sensitive to humidity and will change in shape and design as they fall from the cloud and are exposed to fluctuating temperatures. There are many possible branching points when a snowflake grows. Adding more and more water molecules gives rise to the infinite possibility of shapes. To have two snow crystals or flakes with the exact history of development is virtually impossible. This is why the scientists widely agree with what Mr. Bentley said, “No two snowflakes are alike”.
Different types of snow crystals
Every snowflake traveled through different environments. Its shape may tell us its journey through the cloud. Here is a quick guide of different types of snowflakes or crystals and the conditions behind their formation. See if you can collect all of them!
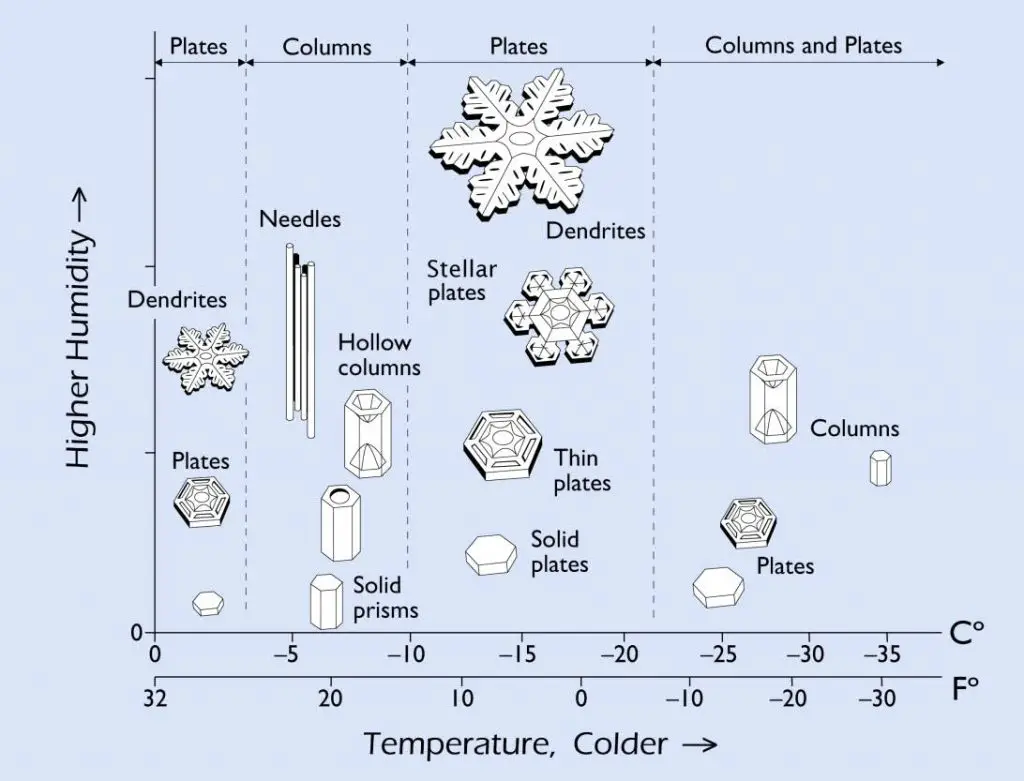
[In this image] Snow crystals grow into different shapes at different temperatures. The reason why this occurs is still something of a scientific mystery.
Image credit: Caltech/Libbrecht
Simple Prism – The most basic snow crystal geometry of a simple flat, hexagonal plate. It usually occurs around 28oF (or -2oC) and low humidity while the lack of water vapor to build branches.
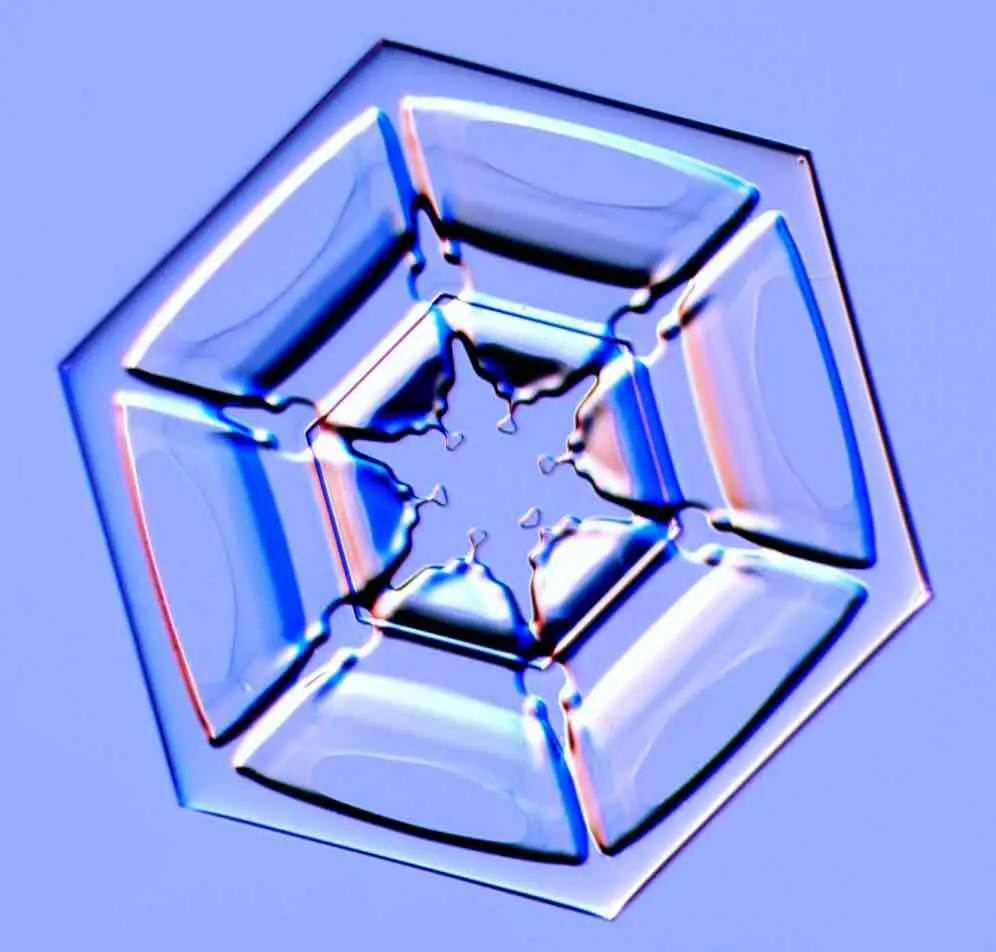
[In this image] Simple Prism.
Photo credit: Ken Libbrecht
Stellar Plate – A hexagonal plate with six short arms. It forms in similar climates as simple prisms while the moisture is limited to allow a slow & steady growth.
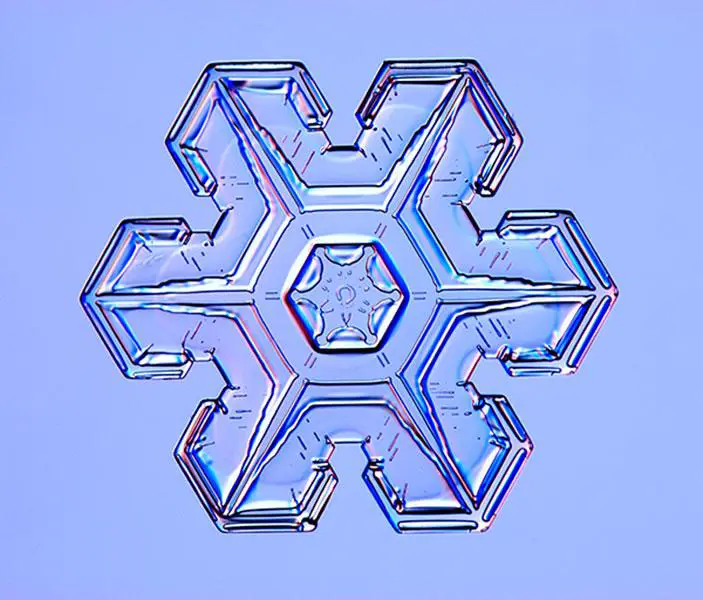
[In this image] Stellar Plate.
Photo credit: Ken Libbrecht
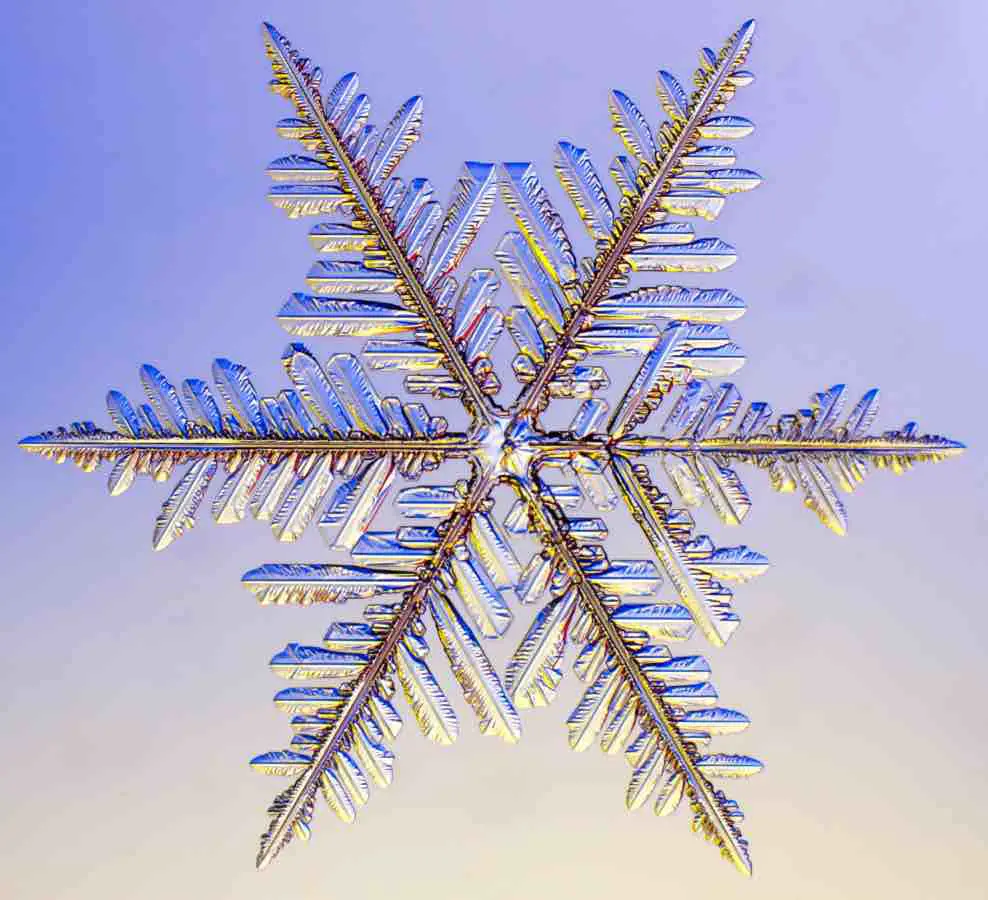
Stellar Dendrite – The common snowflake shape with the fanciest and most complex dendrites. It occurs around 10oF (or -12oC) with very high humidity. This condition allows a rapid growth of large, complicated branches from the crystals, which is easily visible to the naked eye.
[In this image] Stellar Dendrites.
Photo credit: Ken Libbrecht
Fernlike Stellar Dendrite – Like stellar dendrites but with more side branches on each main arm. They make the best powder snow for skiing.
[In this image] Fernlike Stellar Dendrite.
Photo credit: Ken Libbrecht
Hollow Column – It occurs in medium cold (23oF or -5oC) with low-moderate humidity. The hollow part in each column is also hexagonally symmetrical.

[In this image] Hollow Columns.
Photo credit: Ken Libbrecht
Capped Column – These flakes start as columns and then grow plates on each end.
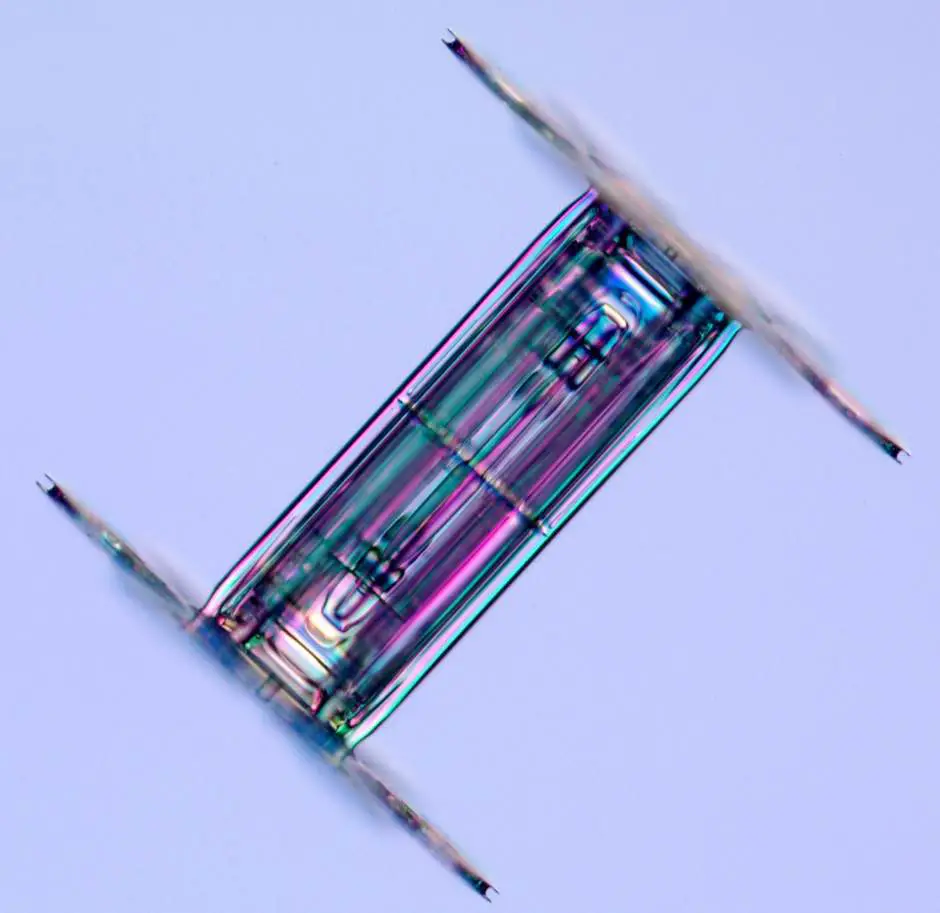
[In this image] Capped Column.
Photo credit: Ken Libbrecht
12-Sided Snowflake – It occurs when a capped column twists 30 degrees and grow dendrites. This “crystal twinning” is very rare to find. 12-sided snowflakes may also occur if two small six-branched snow crystals collide in mid-air. They might stick together and grow into a twelve-branched snowflake.
[In this image] Twelve-branched Snowflakes.
Photo credit: Ken Libbrecht
Bullets – It forms when several columnar crystals grow from a single nucleus. Bullets always start out in clusters, but the clusters can break up to yield individual bullet crystals.
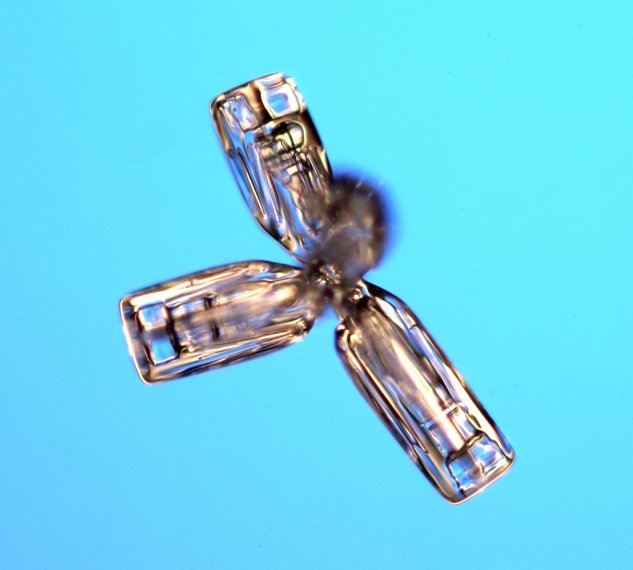
[In this image] Bullet rosettes.
Photo credit: Ken Libbrecht
Needle – Ice crystals with the shape of thinner columns. It occurs in the same temperature range as hollow columns but with slightly higher humidity. Some needles (as well as columns and prisms) can also occur when it’s cooler than -4oF (-20oC), but this is rare since typically less water vapor in very cold air.
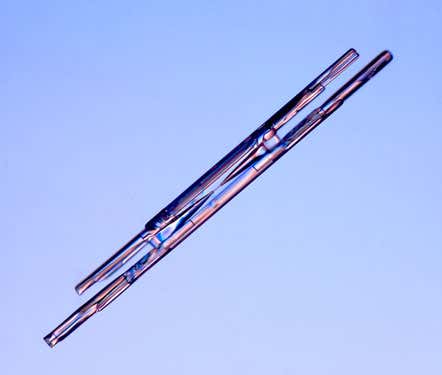
[In this image] Needle.
Photo credit: Ken Libbrecht
Triangular Crystal – Aerodynamical effects may produce these unusual snow crystals. They are typically small, shaped like truncated triangles. Sometimes branches sprout from the corners.

[In this image] Triangular Crystals.
Photo credit: Ken Libbrecht
Rimed Snowflake – Often a snow crystal will collide with some water droplets, which freeze onto the ice. These droplets are called rime. A snow crystal might have no rime, a few rime droplets, quite a few, and sometimes the crystals are completely covered with rime.

[In this image] Rimed Snowflakes.
Photo credit: Ken Libbrecht
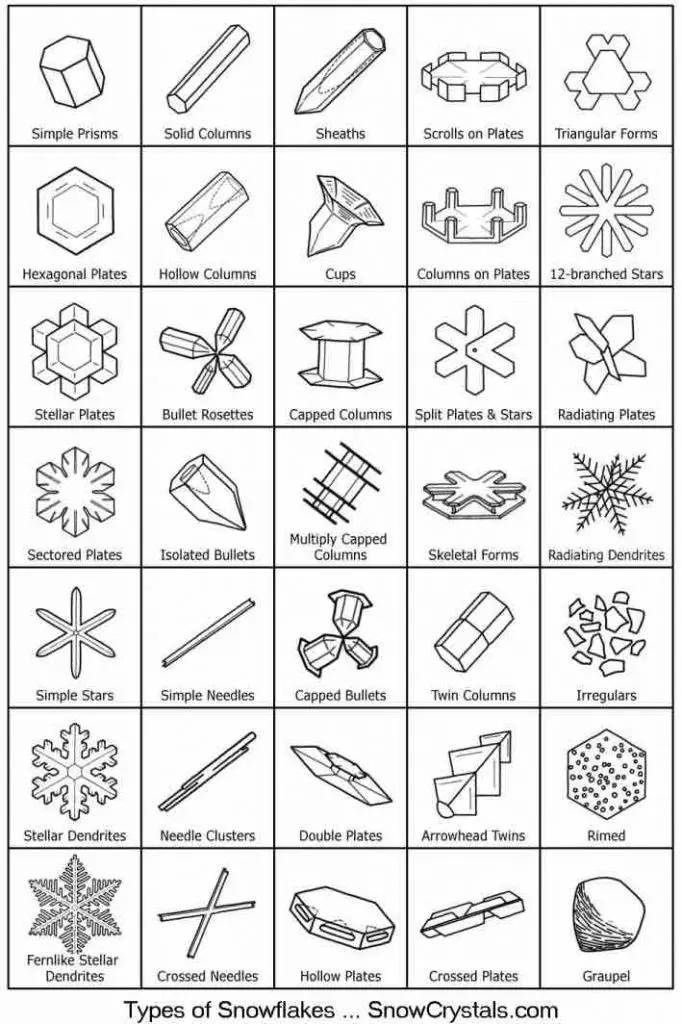
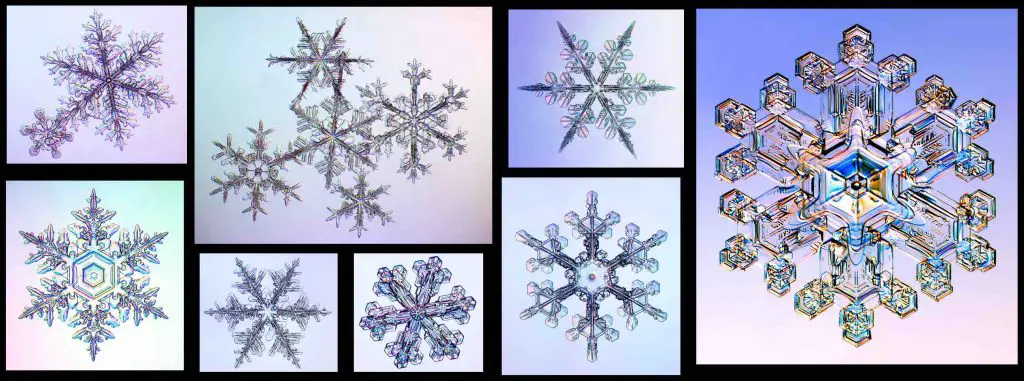
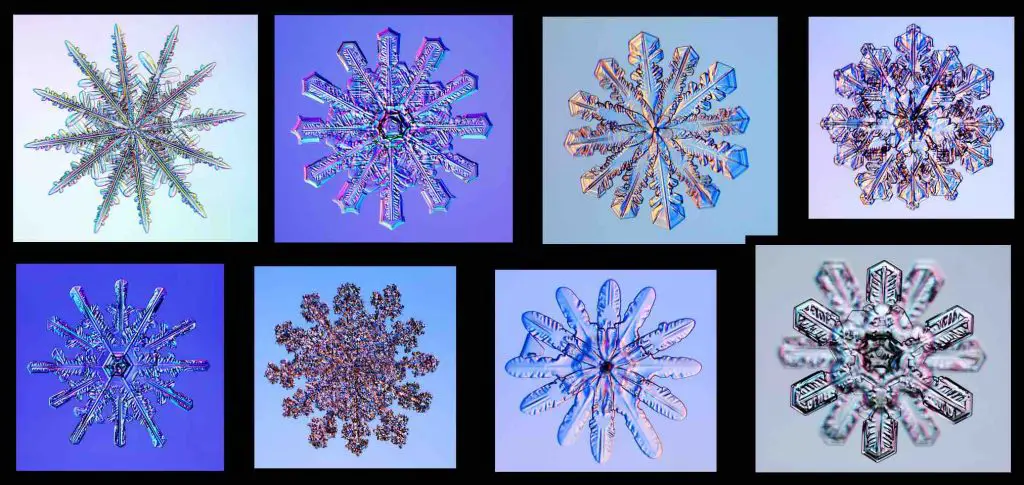
[In this image] More types of snow crystals.
If you like to learn more about snowflakes and what kinds of crystals can be found, “Ken Libbrecht’s Field Guide to Snowflakes” could be great for you.
The snowflakes you found may not be a perfect hexagon. Why?
Mr. Bentley’s collection is dominated by what comes to be our iconic view of snowflakes – each perfectly 6-sided symmetrical crystal. However, you should be aware that Bentley’s photographs were carefully selected to show the most beautiful masterpieces of nature. Real snow falling in your backyard may look very different (or “not perfect”).
There are many reasons leading to irregular crystals. On a blizzard day, a snowflake may collide with another snowflake to form something entirely different – an aggregate or light fluffy snow. Strong wind may also damage the perfect symmetry of crystals by breaking one arm or two. If the temperature fluctuates, a snowflake may collide and freeze with other water droplets – a process known as “riming”, resulting in a little ice pellet called a “graupel” or the hard packed snow. If the temperature raises, snowflakes turn into sleets, a precipitation consisting of mixed ice, rain, and snow.
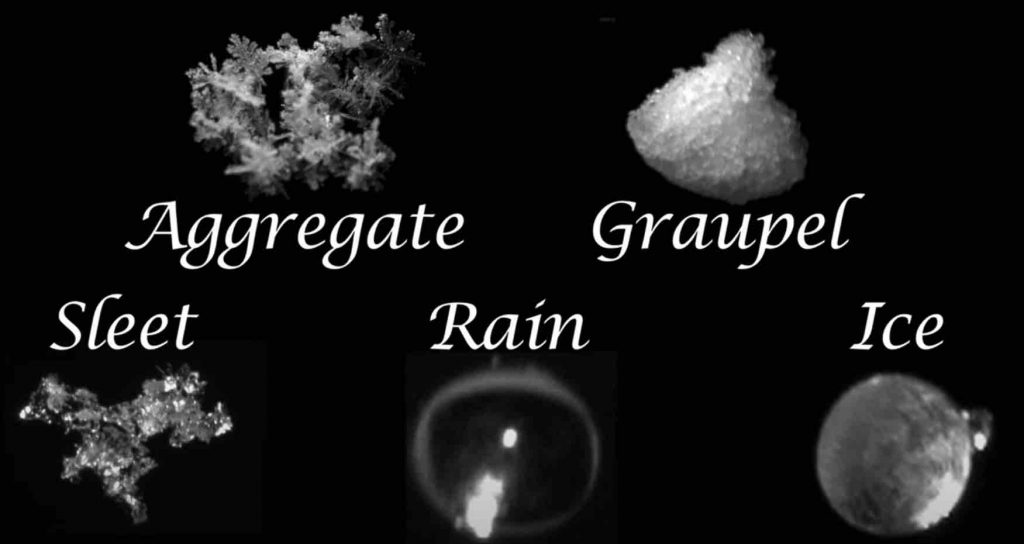
[In this image] Instead of perfect snowflakes, you may encounter these forms of wintery precipitation.
Image source: modified from National Science Foundation
“Designer” snow crystals in the lab
Scientists can grow “designer snowflakes” from water vapor under controlled conditions in the laboratory. They might be called synthetic crystals. Scientists can “design” the final shapes of snowflakes by changing the temperature and humidity as the crystal grows – like a new form of ice sculpture!
If you want to know more about this story, visit Dr. Kenneth G. Libbrecht’s lab.
[In this image] Follow the spiral to see how a tiny ice crystal (center-left) grows into a complex, lab-grown snowflake (right), 60 times larger, just 58 minutes later.
Photo credit: Ken Libbrecht
[In this video] A movie of growing snowflakes.
Photo credit: Ken Libbrecht
Extended Read
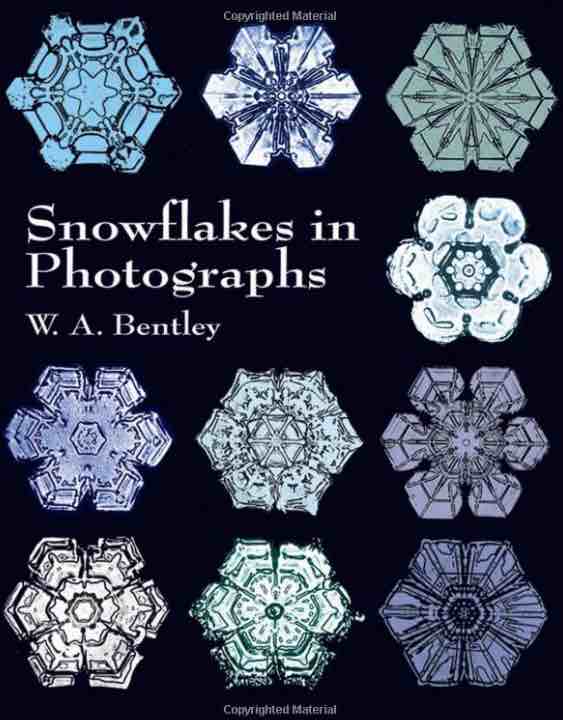
1. Snowflakes in Photographs – the Collection of Wilson A. Bentley’s snowflake pictures.
2. Snowflake Bentley – the Story of Wilson A. Bentley for K to 8-th grade.

3. The Snowflake: Winter’s Frozen Artistry.

4. Ken Libbrecht’s Field Guide to Snowflakes.

5. The Art of the Snowflake: A Photographic Album.
6. Sky Crystals: Unraveling the Mysteries of Snowflakes

7. Visit Jericho Historical Society for the “Snowflake” Bentley Exhibit located at the Old Red Mill in Jericho, Vermont.
References
Snow Crystals.com
Is it really true that no two snowflakes are alike?
Snowflake Science